Top 46 features of WordPress full site editing
Try MaxiBlocks for free with 500+ library assets including basic templates. No account required. Free WordPress page builder, theme and updates included.
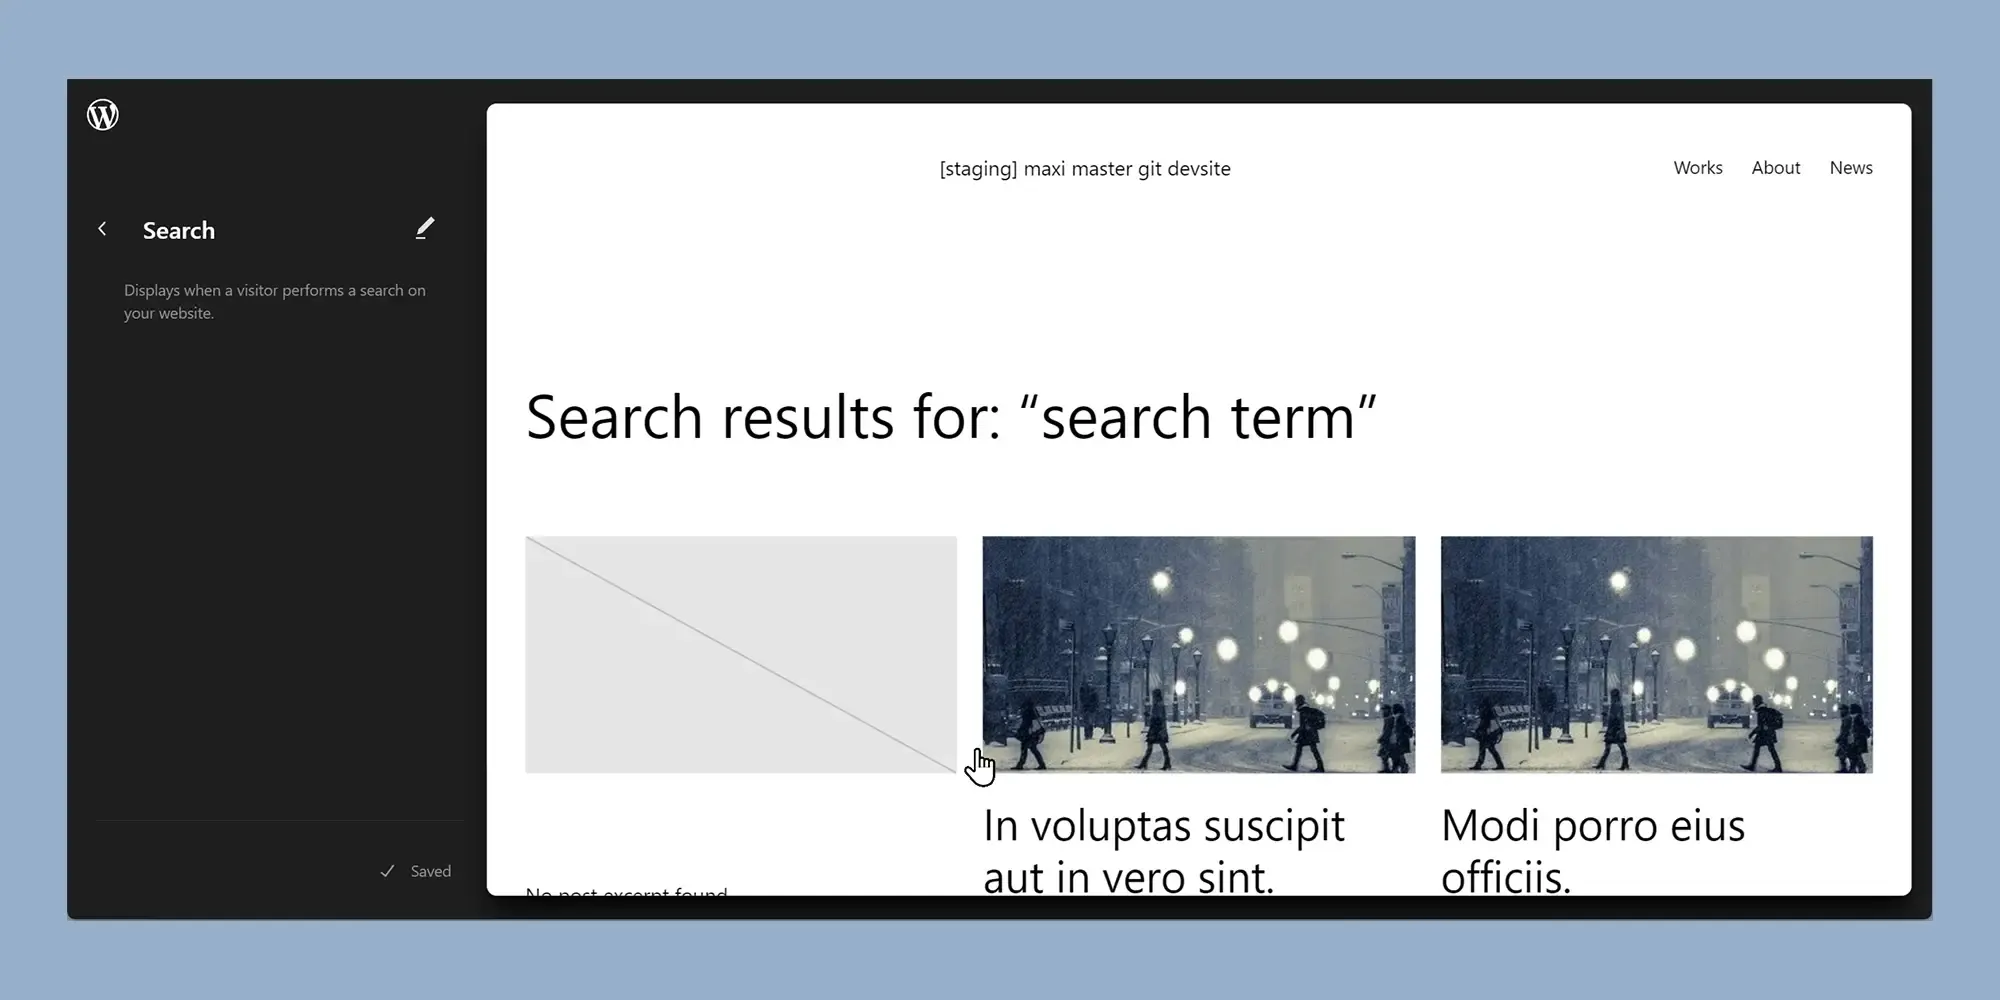
WordPress Full Site Editing (FSE) is a feature that lets you design and customise your entire website using blocks. This includes global parts of your site like the header, footer and sidebar. With FSE, you can build your theme visually in the block editor, without needing to rely only on traditional themes or external page builders.
Explore the best features of WordPress Full Site Editing (FSE)
WordPress Full Site Editing (FSE) is transforming the way we build and customize websites. With its block-based system, FSE gives you full control over your site’s layout, design, and functionality without the need for custom code. Below, we explore some of the most powerful features of WordPress FSE, starting with two foundational tools: the Site Editor and the Gutenberg Block Editor.
1. The WordPress Site Editor
Description: The Site Editor is a unified interface that lets you visually design and manage your entire WordPress website headers, footers, templates, and more using blocks.
The WordPress Site Editor gives you complete design control over your site’s structure. You can build and customize your header, footer, page templates, and global styles, all within one central interface. This is a major step forward compared to the limited customization options of classic themes.
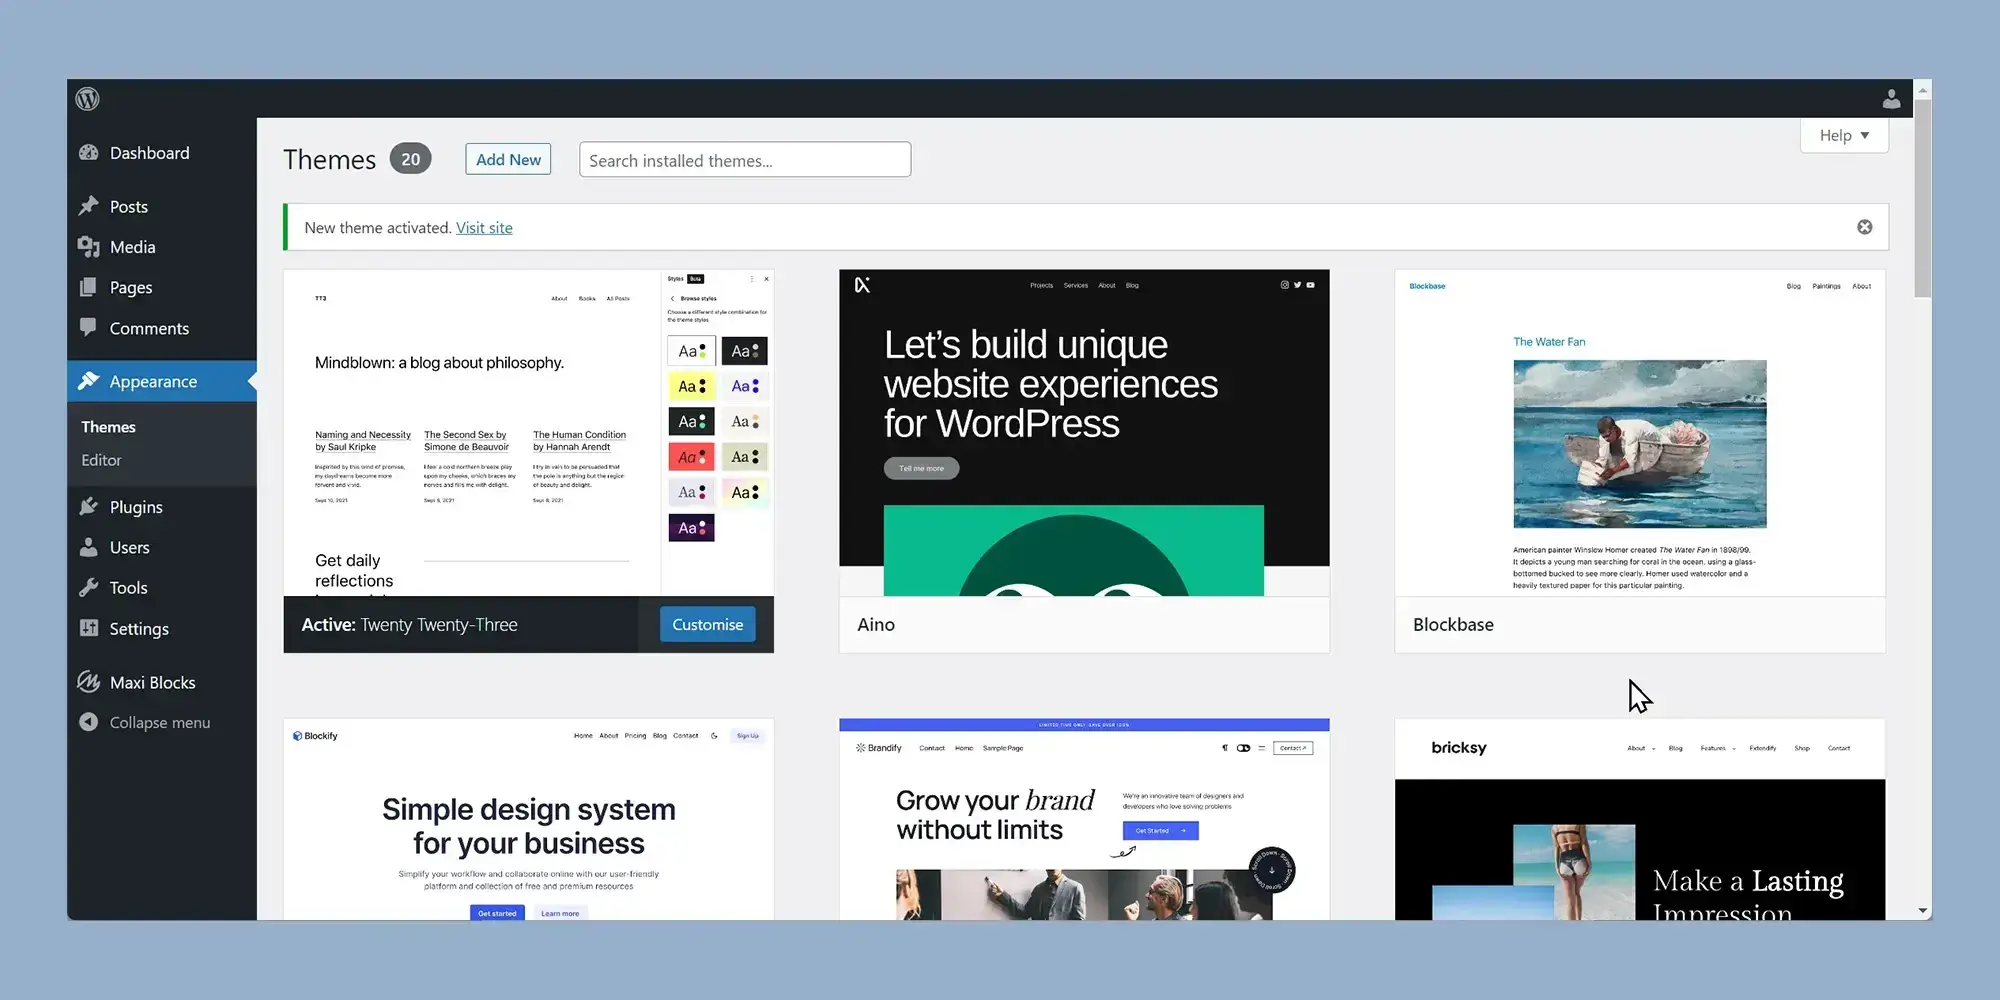
To access the Site Editor, install and activate a block-based theme. Once activated, go to Appearance > Editor to launch the editor.
Key features include:
- Navigation menu: Manage and customize menus for your site.
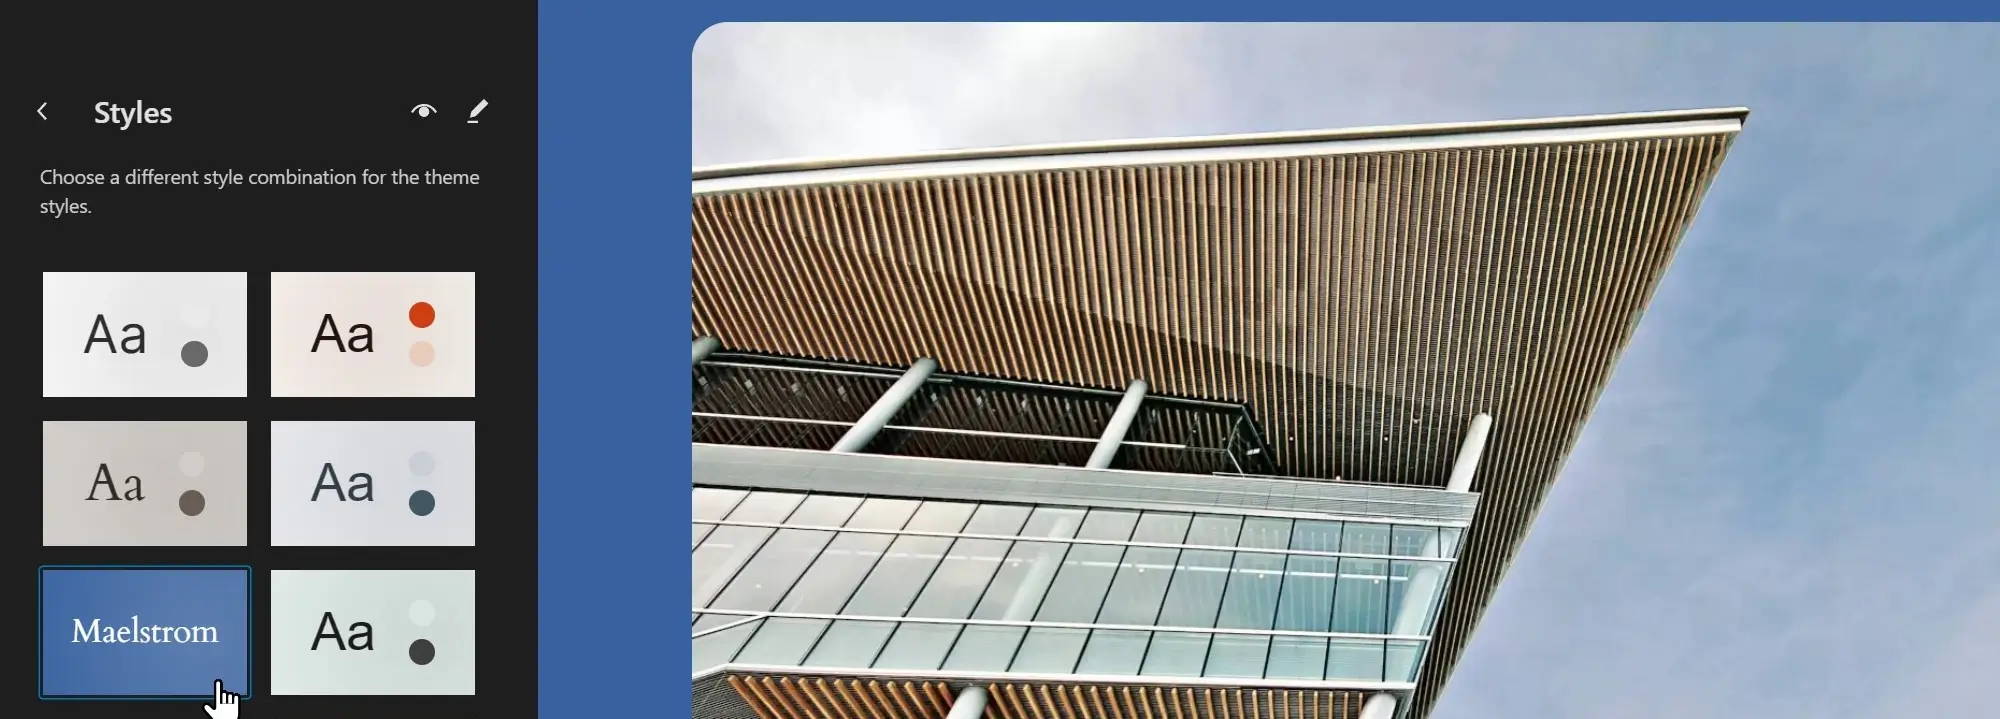
- Styles panel: Edit global styles including typography, colors, and layout spacing.
- Pages menu: Edit content and structure across all pages from one location.
- Templates manager: Customize or create page templates and layout structures.
- Patterns section: Reuse synced block patterns and manage template parts like footers or banners.
Using the Site Editor, you can assemble your entire site with blocks whether you’re creating dynamic landing pages, adjusting the layout of a post template, or setting global design rules. It combines the flexibility of a visual builder with native WordPress functionality.
2. Gutenberg Block Editor
Description: Also known as the Block Editor, Gutenberg is the core editing experience in WordPress. It enables you to create and style content using a visual, drag-and-drop interface built entirely on blocks.
The Gutenberg Block Editor, introduced in WordPress 5.0, marks a significant evolution in how content is created. Every element text, image, button, or widget is treated as a separate block that can be customized, rearranged, and styled individually.
Key benefits of the Gutenberg Block Editor:
- Modular layout building: Each block (paragraphs, headings, galleries, buttons, etc.) is independent and customizable.
- Visual editing experience: See changes live as you create or modify content.
- Reusable blocks: Save commonly used block arrangements for future use.
- Advanced layouts: Easily create multi-column designs, grouped sections, and full-width content areas.
- Custom styling: Control block-specific settings like padding, margin, colors, and fonts without writing CSS.
- Plugin integrations: Add powerful functionality using blocks from third-party plugins (e.g., forms, sliders, testimonials).
The Gutenberg editor forms the foundation of Full Site Editing and is central to WordPress’s roadmap. Each new release introduces expanded features, moving toward a seamless, all-in-one design and publishing experience.
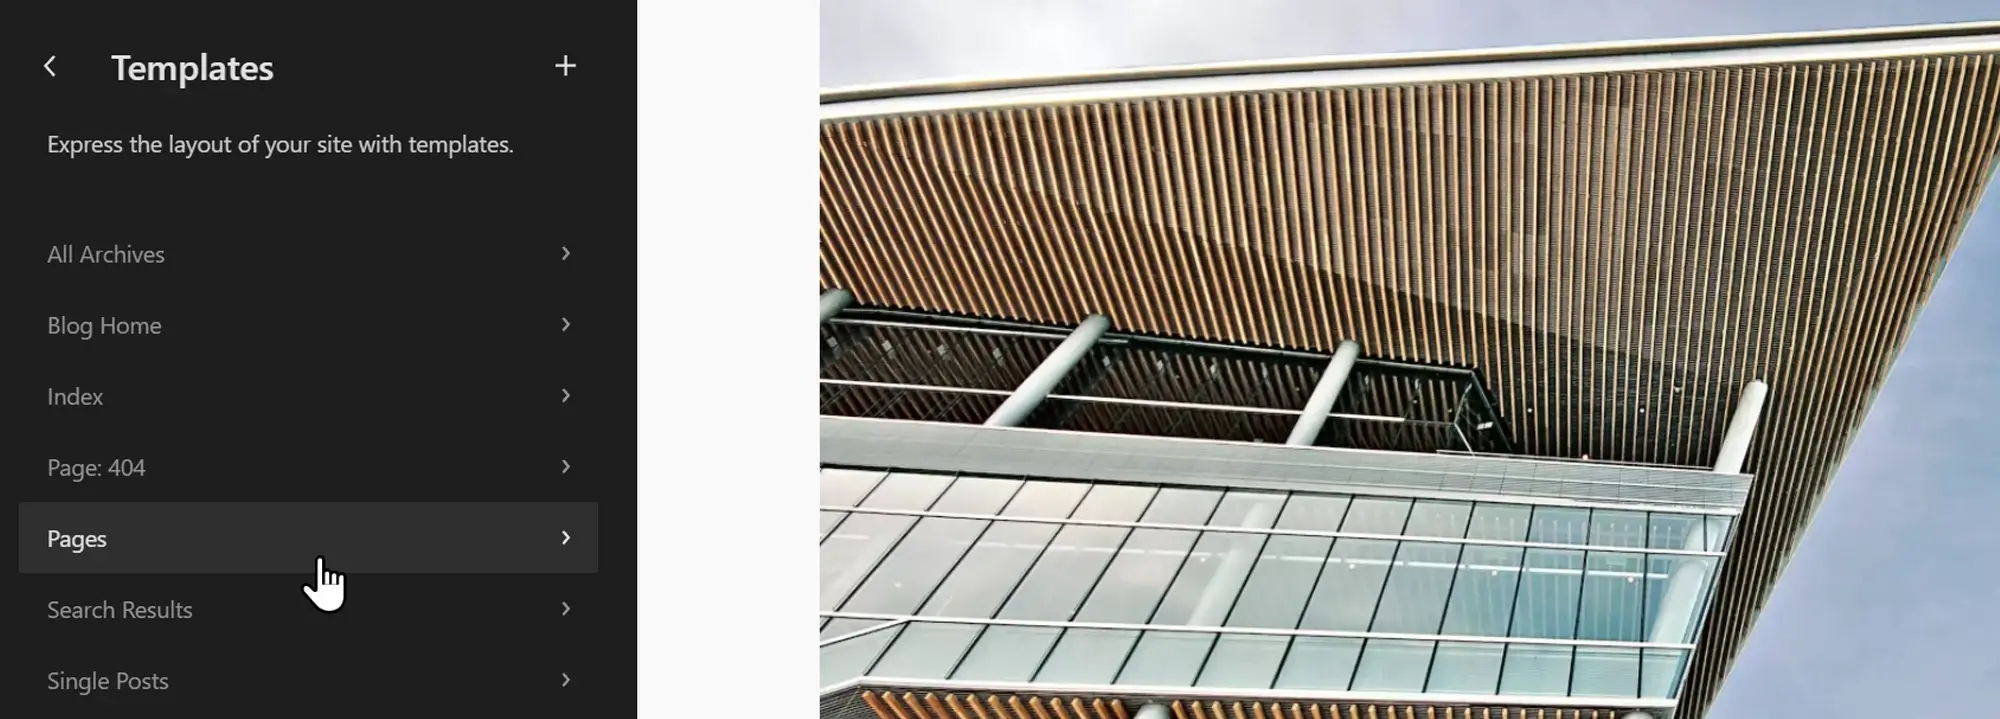
How the WordPress Template Editor simplifies layout control
3. The WordPress Template Editor
Description: The Template Editor allows you to create and customize page templates using blocks perfect for building layouts for blog posts, pages, archives, and more.
The WordPress Template Editor, introduced in WordPress 5.8, is a core component of Full Site Editing (FSE). It gives users a visual, code-free way to design templates for different content types, such as blog posts, category pages, or product archives.
You can access the Template Editor by activating a block theme and navigating to Appearance > Editor in your WordPress dashboard. From there, you can switch between templates, headers, footers, and template parts.
Key features:
- Build page templates visually using the Gutenberg Block Editor
- Create and assign custom templates to specific pages or post types
- Edit template parts (e.g., header and footer) independently
- Lock or unlock blocks to prevent accidental changes
- Apply global styles across all templates for a consistent look
Changes made in a template will reflect on all pages using that layout, helping you maintain brand consistency and streamline your workflow.
4. Global Styles in WordPress FSE
Description: Global Styles let you define site-wide styles for typography, colors, spacing, and layout, ensuring a consistent design throughout your website.
Global Styles give WordPress site owners centralized control over the visual appearance of their website. With just a few clicks, you can set default styles for headings, body text, buttons, links, and layout elements.
This feature works with the theme.json configuration file, which defines default styles across the site and makes it easy to update them in one place.
Key features:
- Set global color palettes and typography
- Define default spacing, layout width, and breakpoints
- Apply animation triggers and effects
- Customize the look of individual blocks or sections
- Manage design settings directly from the visual editor
You’ll find the Global Styles interface under Appearance > Editor > Styles, where you can tweak your theme’s appearance without editing each page manually.
5. The Query Loop Block
Description: The Query Loop Block dynamically displays content such as recent posts, pages, or products based on specific criteria like category or tag.
The Query Loop Block is a powerful block in the Gutenberg editor that allows you to display lists of posts dynamically, without writing custom code. Whether you’re showcasing recent blog articles, products, or testimonials, this block lets you design flexible layouts with ease.
How to use it:
- Open a post or template in the block editor
- Click the “+” icon and search for “Query Loop”
- Select a layout pattern or build your own
- Configure the query settings (e.g., post type, category, number of posts)
Customization options:
- Choose between list, grid, or column layouts
- Filter by post category, author, date, tag, or custom taxonomy
- Adjust post count, order, and pagination
- Customize inner blocks (e.g., Post Title, Excerpt, Featured Image)
- Apply Global Styles to maintain visual consistency site-wide
Use multiple Query Loop Blocks across different sections of your website to create dynamic content areas like blog feeds, related posts, or category highlights all styled to match your brand.
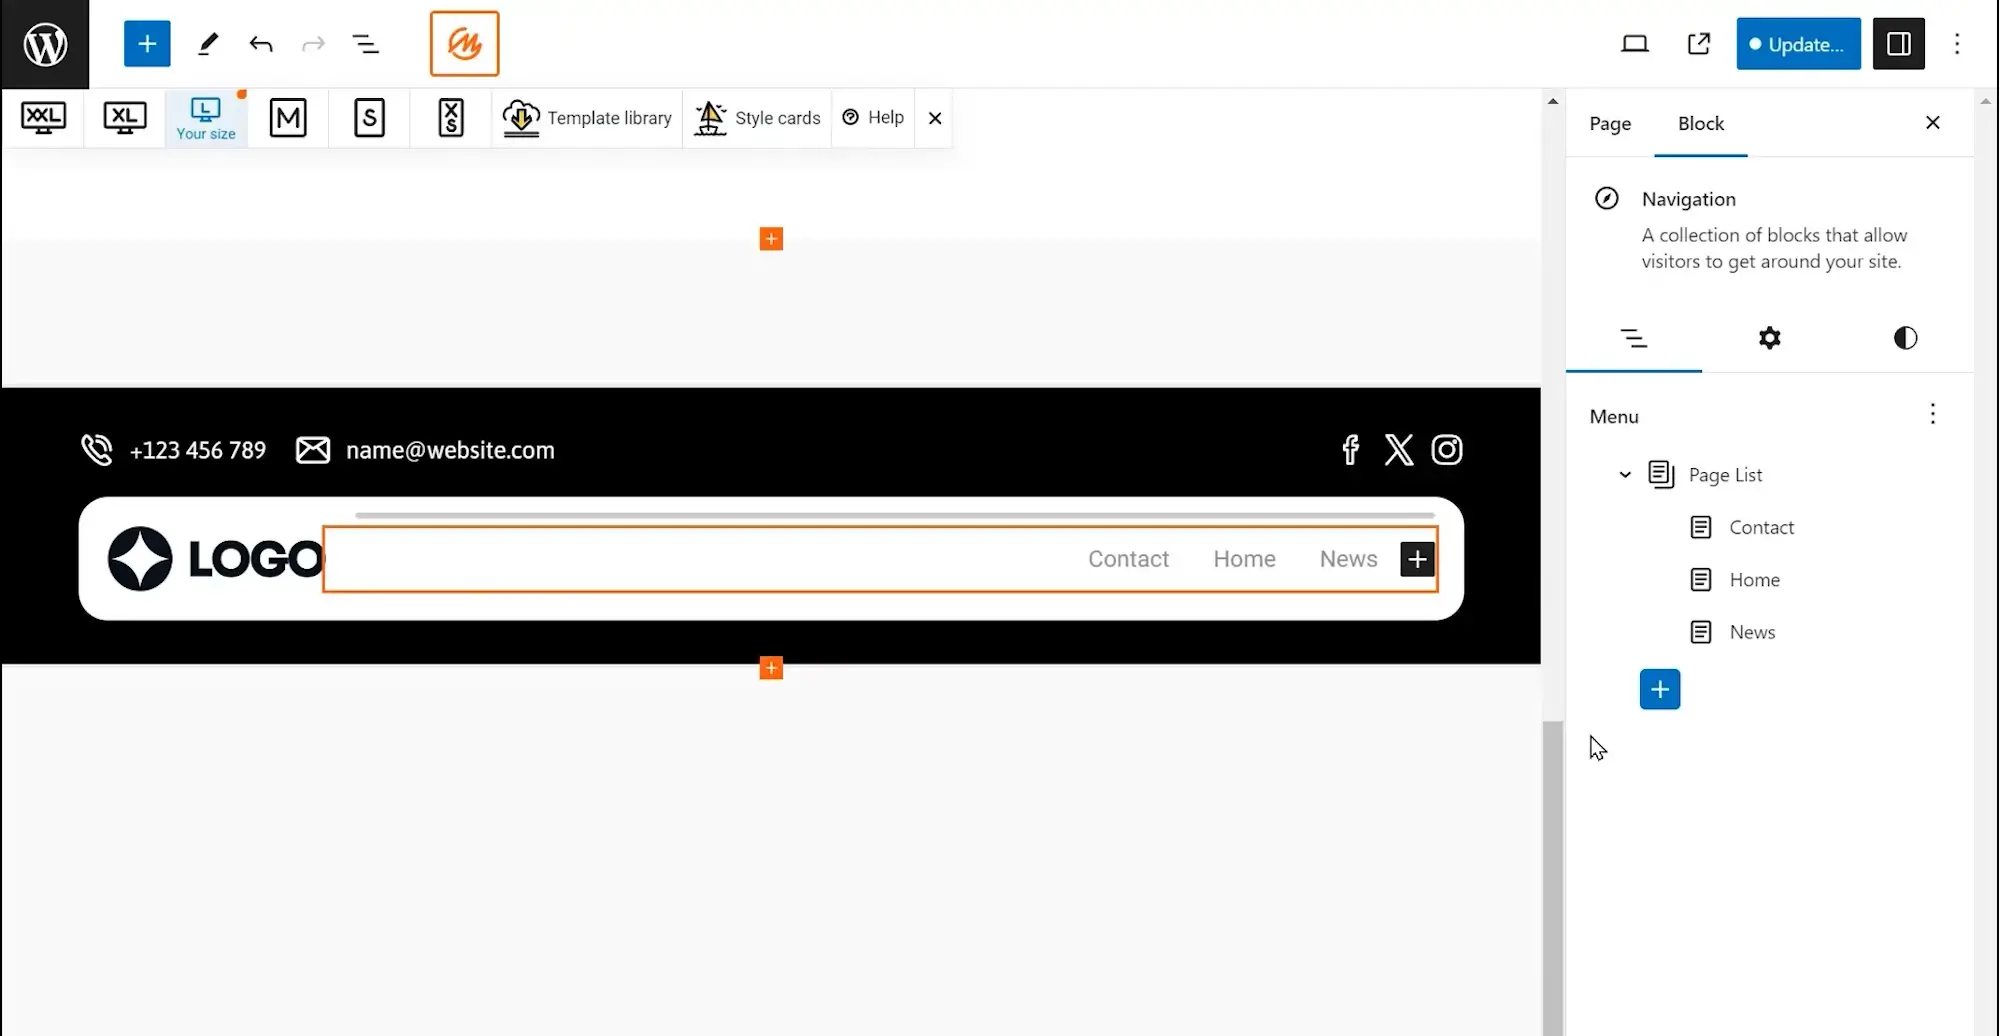
6. WordPress Navigation Block
Description: The Navigation Block lets you build and manage menus visually with drag-and-drop functionality right inside the WordPress editor.
The WordPress Navigation Block, introduced and improved in WordPress 6.0, offers a modern and intuitive way to create and customize site menus directly within the block editor no need to switch to the legacy Menus screen.
Key features:
- Inline editing: Add, remove, and rearrange menu items directly in the editor
- Drag-and-drop menus: Create menus visually using blocks for links, pages, categories, and custom items
- Site view sidebar: Access menus, styles, templates, and reusable components in one place
- Focus mode: Distraction-free editing for complex navigation setups
- Performance upgrades: WordPress 6.3 improved query handling, reducing load times and improving responsiveness when editing menus
The Navigation Block works seamlessly with block themes and allows you to build header menus, footer links, or mobile-friendly navigation structures all within the visual interface streamlining both the design process and user experience.
7. WordPress Custom Block Patterns
Description: Custom Block Patterns are reusable layouts made from groups of blocks ideal for speeding up your design workflow and maintaining consistency across your site.
WordPress Custom Block Patterns let you save and reuse block layouts across multiple pages or posts. Whether you’re designing pricing tables, testimonial sections, hero banners, or CTAs, patterns help you maintain a consistent design while saving time.
Key features:
- Reusability: Insert custom patterns anywhere on your site
- Editable blocks: Modify individual blocks within a pattern after insertion
- Synced vs. standard patterns: Synced patterns update globally across your site Standard patterns are editable per instance without affecting others
- Easy creation: Select a group of blocks Click the three-dot menu Choose “Create pattern” Name it and choose if it should be synced or standard
- Centralized management: Access and manage patterns from the Patterns tab or the Patterns admin panel
With the improvements in WordPress 6.3, you can now build, name, and organize custom patterns directly from the editor, without using code. These design shortcuts not only speed up content creation but also help teams and solo creators maintain a professional, brand-aligned layout across the entire site.
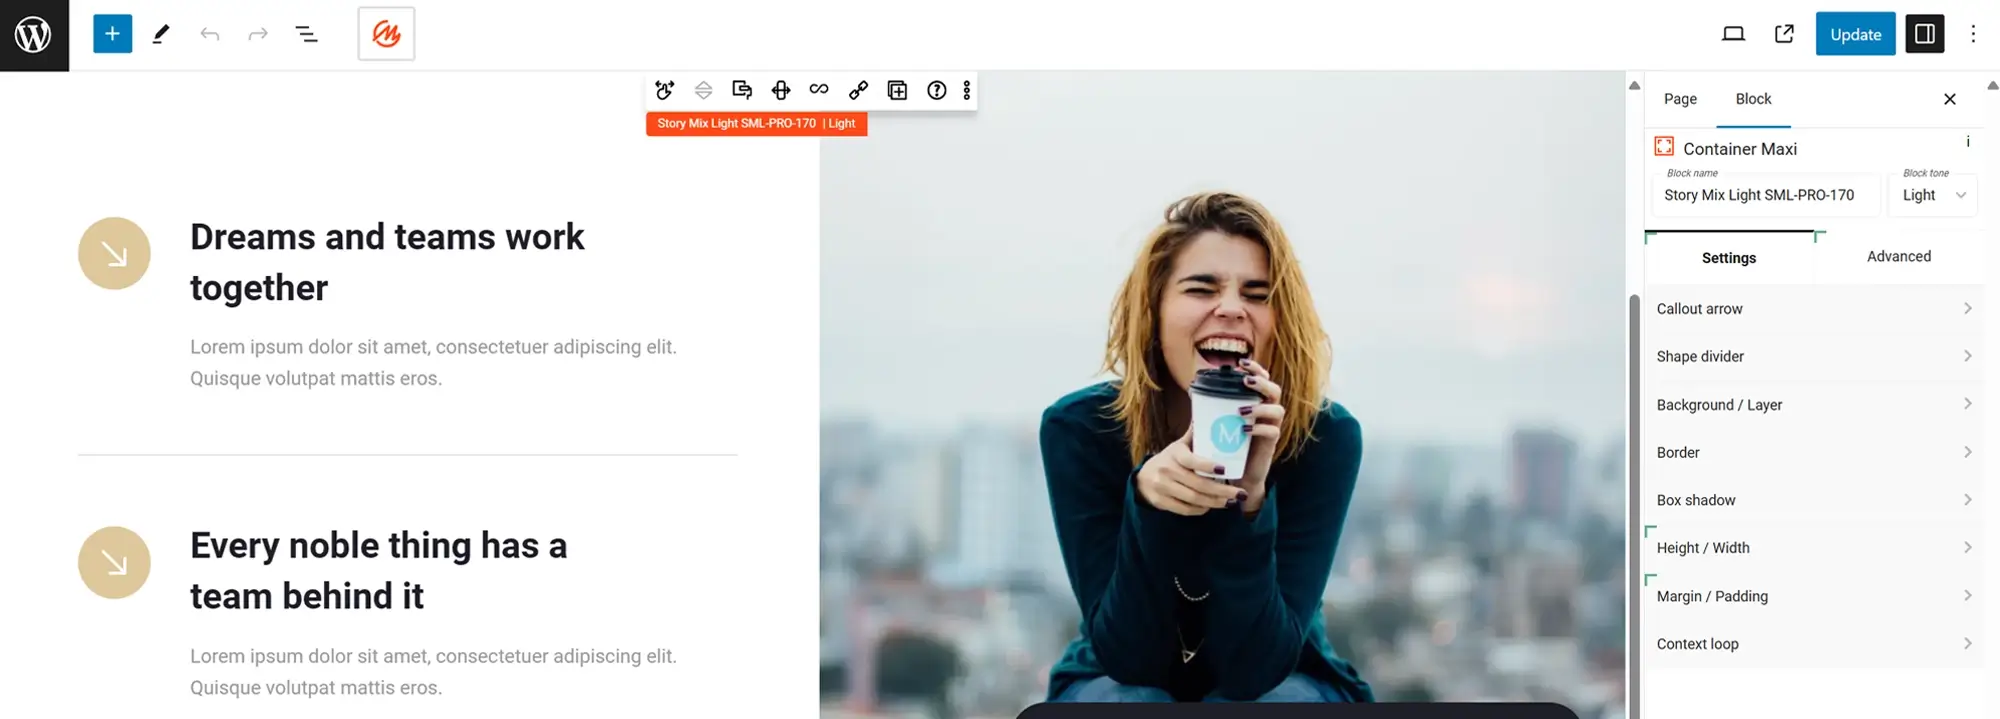
Get focused: Full-screen mode for writing and design
8. Full-screen mode
Description
A distraction-free editing mode that expands the editor to fill the entire screen.
Full-screen mode in WordPress provides a clean, distraction-free writing environment by removing the admin sidebar and top toolbar. This allows you to focus entirely on your content while editing.
To activate full-screen mode, click the three-dot menu in the top-right corner of the editor and select Fullscreen mode, or use the shortcut Ctrl + Shift + Alt + F on Windows or Cmd + Shift + Option + F on Mac.
WordPress also offers additional focus tools:
- Spotlight mode dims all blocks except the one you’re editing
- Distraction-free mode hides even more UI elements for maximum focus
These features make the editing experience cleaner and more immersive.
9. Block inserter
Description
A searchable interface for quickly adding blocks to your content.
The block inserter is an essential tool in the WordPress block editor, allowing you to browse, search, and insert blocks into your pages and posts.
To use it, click the plus icon (+) in the top-left corner of the editor. You’ll see a categorized list of blocks with live previews and a search bar to quickly find what you need.
You can also type / directly into the content area to bring up inline block suggestions.
Key features of the block inserter:
- Organizes blocks by category (text, media, design, etc.)
- Shows visual previews of each block
- Supports drag-and-drop functionality
- Allows quick access to block patterns and reusable blocks
The block inserter helps you build pages faster without needing to write code.
10. WordPress block directory
Description
Access to a library of additional blocks created by the WordPress community.
The WordPress block directory offers a wide collection of free blocks created by developers and shared with the community. These blocks extend the core functionality of the editor and can be added directly from within the WordPress dashboard.
To explore the block directory, open the block inserter and click Explore more blocks at the bottom. This will launch the full directory interface.
Key features of the block directory:
- Hundreds of free blocks for every use case
- Organized into categories like galleries, CTAs, and layouts
- Includes ratings, reviews, and visual previews
- Supports one-click installation from the editor
- Makes it easy to extend your site without plugins
The block directory is a valuable resource for building modern WordPress sites with enhanced features no custom development required.
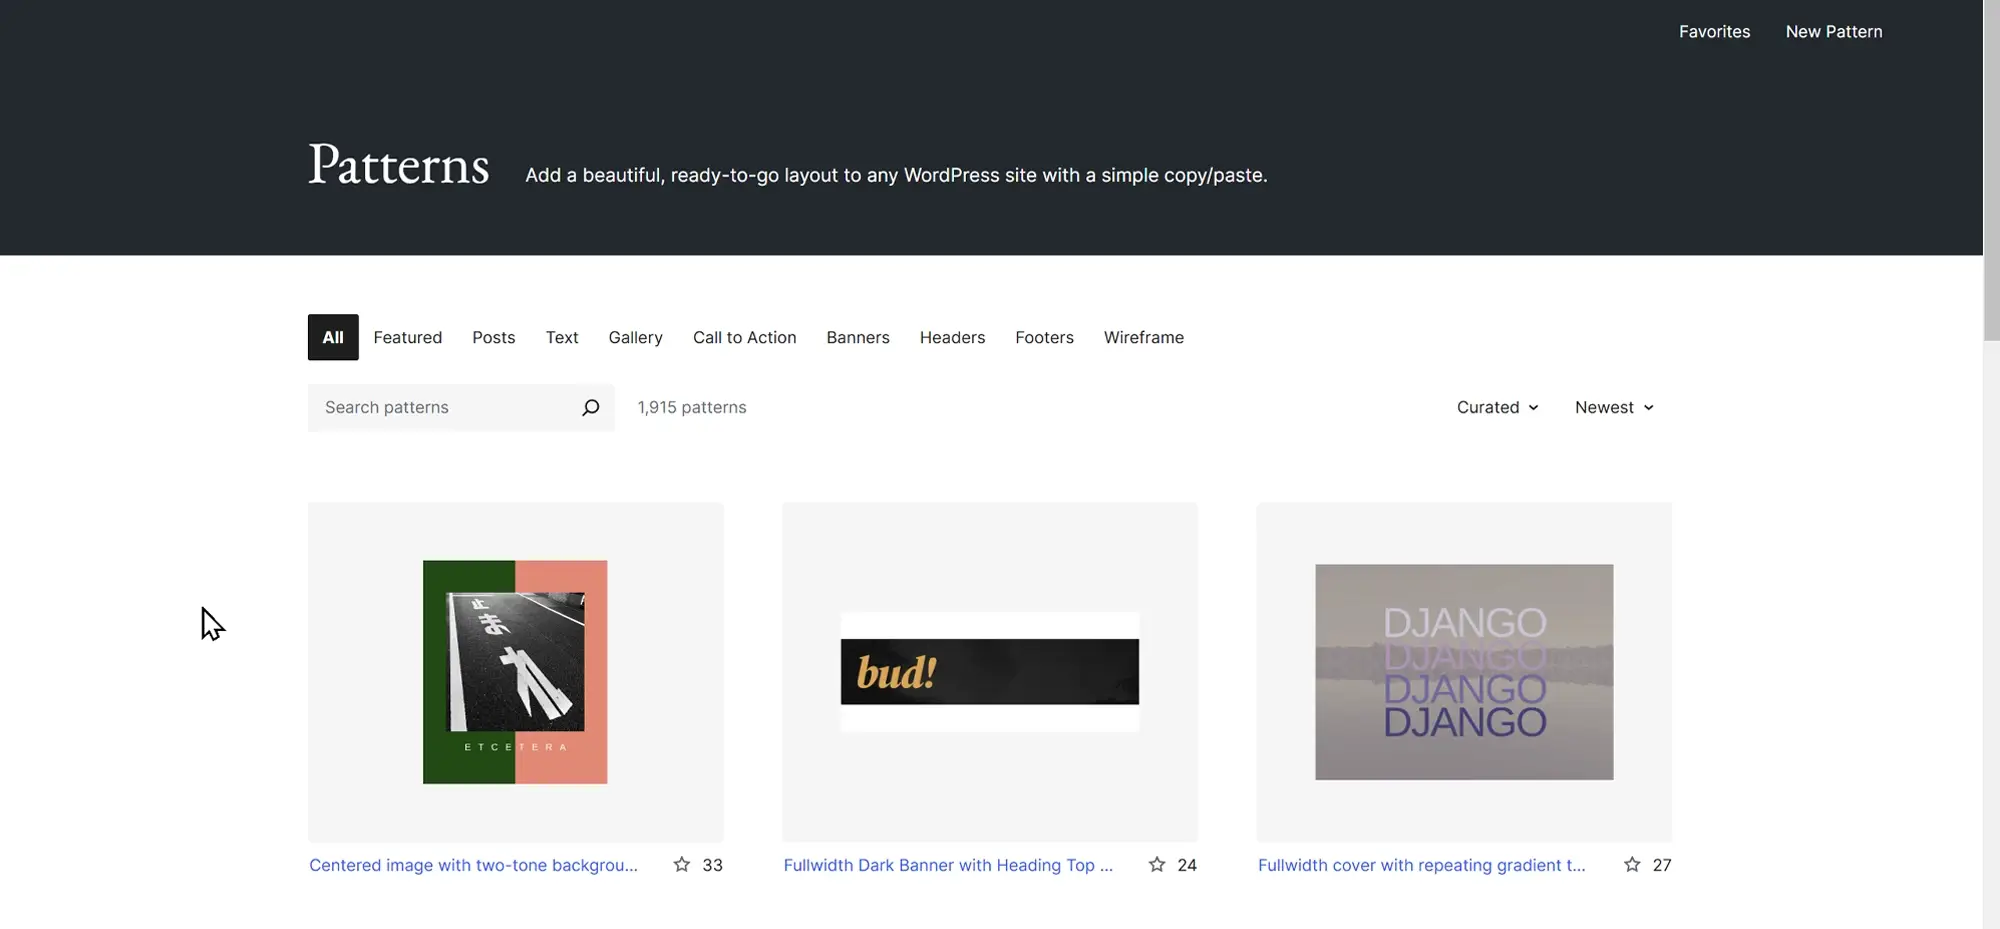
Reusable blocks: The ultimate content shortcut
11. Reusable blocks
Description
Save custom blocks and use them across different pages and posts.
Reusable blocks in WordPress let you save a group of blocks as a single element that can be reused across your site. This is especially useful for repeating elements like CTAs, contact sections, or styled disclaimers.
To create a reusable block, arrange your blocks, click the three-dot menu in the toolbar, and choose Add to reusable blocks. Name it and click Save. Your new block will now appear under the Reusable tab in the block inserter.
Key features of reusable blocks:
- Maintain consistency across multiple pages
- Save time by reusing layouts and content
- Automatically update all instances when changes are made
- Manage and organize all reusable blocks from one location
- Optionally customize individual instances if needed
Reusable blocks are ideal for marketers, bloggers, and teams who want to streamline their content creation process without sacrificing quality or brand alignment.
12. WordPress inline text editing
Description
Edit text directly within the block editor without opening separate panels.
Inline text editing allows you to type and modify content directly in the WordPress block editor without switching panels or opening extra settings. This speeds up writing, proofreading, and revising content on the fly.
It’s especially helpful for:
- Writing long-form blog posts or landing pages
- Quickly editing headlines, paragraphs, or button text
- Fixing typos and rewording content in real time
- Improving the overall content workflow for writers and editors
With inline editing, what you see is truly what you get. It keeps the editing experience intuitive and distraction-free, making WordPress more user-friendly for non-technical users.
13. WordPress drag-and-drop functionality
Description
Easily move blocks around to customize your layout.
The drag-and-drop functionality in the WordPress block editor allows users to rearrange content visually. Simply click on a block, hold, drag it to a new spot, and drop it no coding needed.
Key advantages:
- Intuitive layout editing for beginners
- Quickly restructure pages and sections
- Combine with reusable blocks and patterns for faster page building
- Works across desktop and most responsive views
Drag-and-drop editing is a core reason WordPress Full Site Editing feels modern and accessible. It empowers users to create professional-looking layouts without any developer skills.
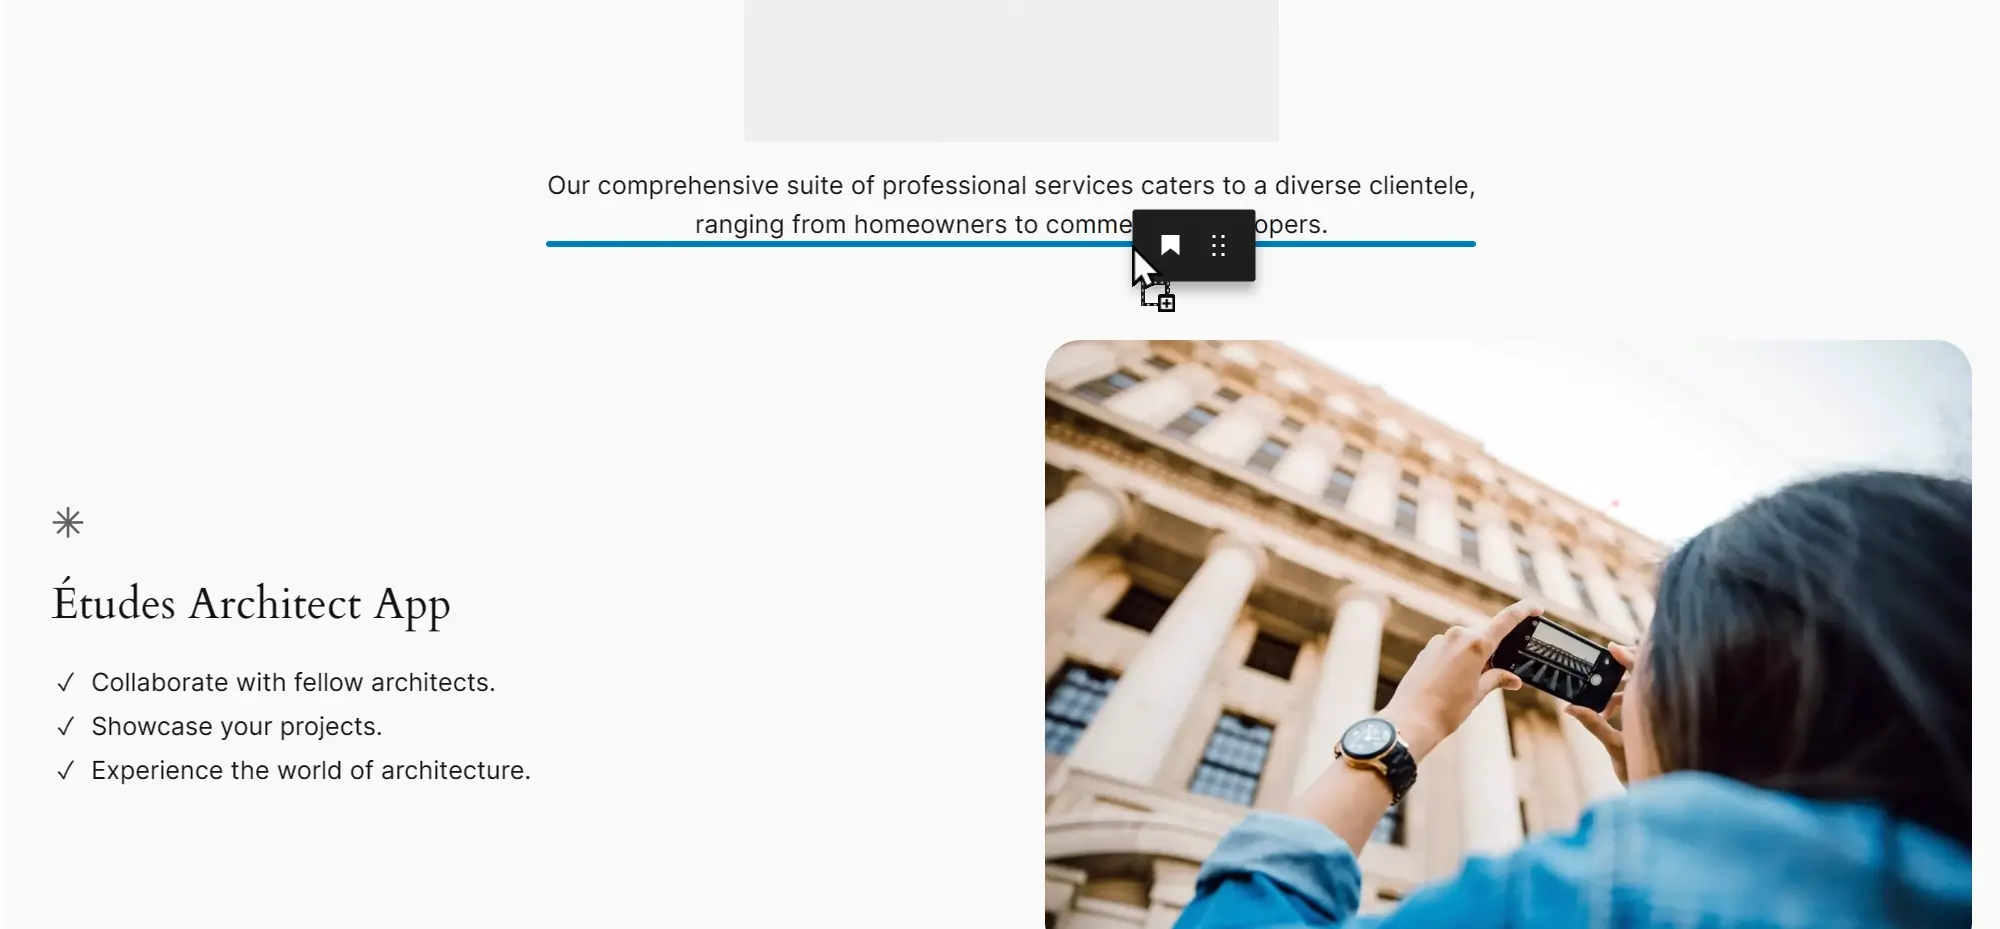
Transform blocks to match your content
14. Block transformations
Description
Convert blocks into different types to quickly adapt your content.
Block transformations in WordPress let you convert one type of block into another with just a few clicks. This feature simplifies content editing by allowing you to switch block types without rebuilding your layout.
There are several types of supported transformations:
- Block-to-block transformations: Convert existing blocks into similar types using the toolbar menu (e.g., paragraph to heading or list).
- Prefix transformations: Create blocks by typing special characters (e.g., “#” for a heading).
- Raw transformations: Convert pasted HTML or plain text into blocks.
- Shortcode transformations: Automatically convert shortcodes into their block equivalents.
Block transformations are especially useful when adjusting layouts or content types on the fly, making the editing experience faster, more flexible, and user-friendly. Developers can even define custom transformation behavior in block configuration files using the transforms key.
15. Custom CSS
Description
Add custom CSS to blocks for advanced styling options.
Custom CSS in WordPress gives you full design control by allowing you to apply your own styles beyond what’s available in the default theme or block settings.
There are several ways to add custom CSS:
- Appearance > Customize > Additional CSS: Built into WordPress, this option lets you add and preview CSS code in real time.
- CSS plugins: Tools like Simple Custom CSS, WP Add Custom CSS, or CSS Hero offer extra features, such as scoped styling or visual editors.
- Custom plugins: Developers can create a custom plugin to apply site-wide or block-specific CSS.
- Block-level CSS: Many blocks support inline or per-block CSS classes via the “Advanced” settings panel.
Adding custom CSS is ideal for fine-tuning your design whether you want to adjust padding, override default colors, style buttons, or create custom layouts. It bridges the gap between visual design and advanced customization without altering theme files.
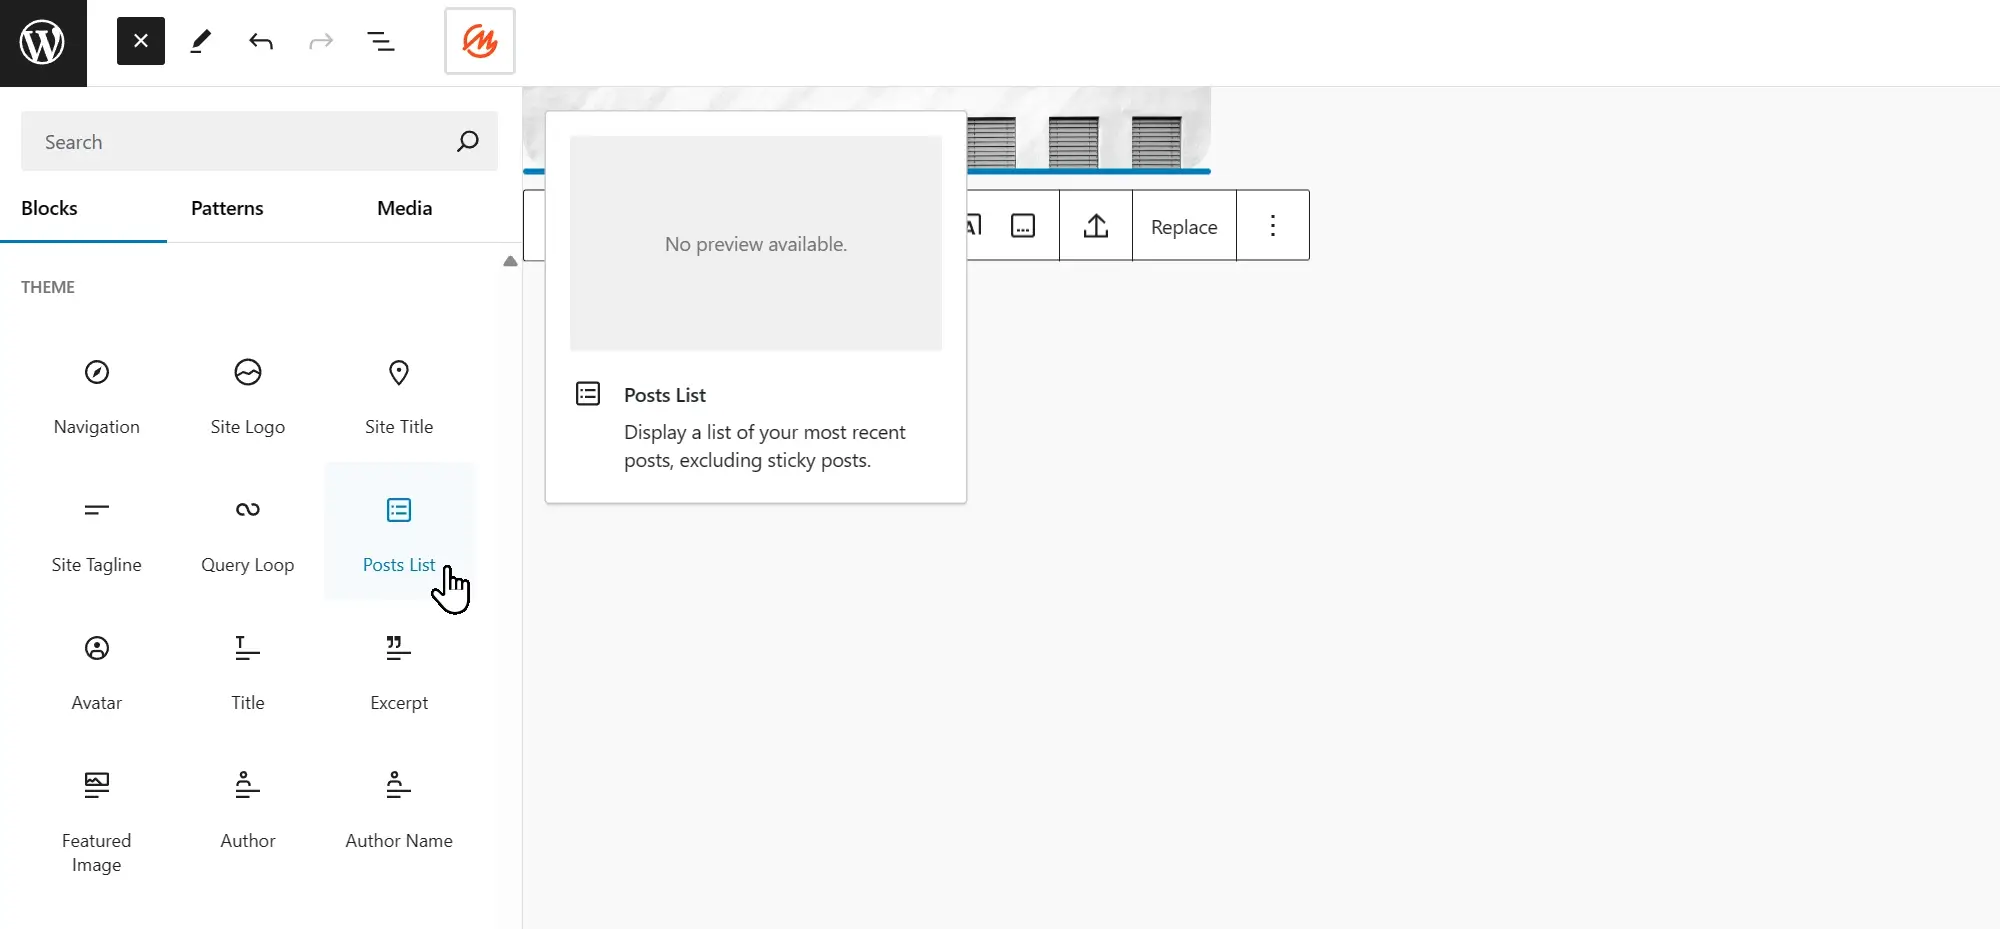
Theme blocks: The backbone of FSE websites
16. WordPress theme blocks
Description
Access blocks specific to your theme for cohesive design elements.
Theme blocks are specialized blocks that work with WordPress block themes, providing dynamic and structural content options to build a fully customized website using Full Site Editing.
These blocks are typically bundled with FSE-compatible themes or available via the Gutenberg plugin. They integrate directly into the Site Editor and help bring consistency to your site’s structure and branding.
Common theme blocks include:
- Navigation block – Create and edit menus
- Query loop block – Display filtered lists of posts, products, or pages
- Post content block – Dynamically show the content of the current post or page
- Site title block – Automatically displays your website’s name
- Site tagline block – Adds your site’s tagline or description
- Site logo block – Inserts a logo anywhere on your site
- Template part block – Reuse global components like headers or footers
Using theme blocks allows for modular site building, improves consistency, and simplifies global edits all without needing to write code.
17. Group block
Description
Combine multiple blocks into a single group for easier management.
The group block is a container element that lets you bundle multiple blocks together. This makes it easier to manage, move, and apply styles to several blocks at once.
You can add a group block by clicking the “+” icon and selecting Group, then inserting other blocks inside it. Group blocks support styling options such as:
- Background color
- Border and padding
- Layout alignment
- Flex and grid-based positioning
Use the block breadcrumbs to select the group or click the group outline directly in the editor. You can also ungroup at any time to break blocks back into individual elements.
Group blocks are essential for structuring complex page sections like hero banners, pricing tables, or nested content areas.
18. Column block
Description
Create multi-column layouts without coding.
The column block is part of the layout system in the block editor, allowing you to organize content side-by-side. You can create up to six columns in a row, with full control over how each column is styled and populated.
Each column can contain text, media, buttons, or other blocks, and the layout is responsive automatically stacking on smaller devices.
Customization features include:
- Column width, spacing, and alignment
- Background color, borders, and padding
- Typography settings per column
- Custom CSS classes and HTML anchors
To use the column block, simply add it from the inserter, choose a layout, and fill in each column with content. It’s a versatile tool for breaking up content and improving visual flow on pages.
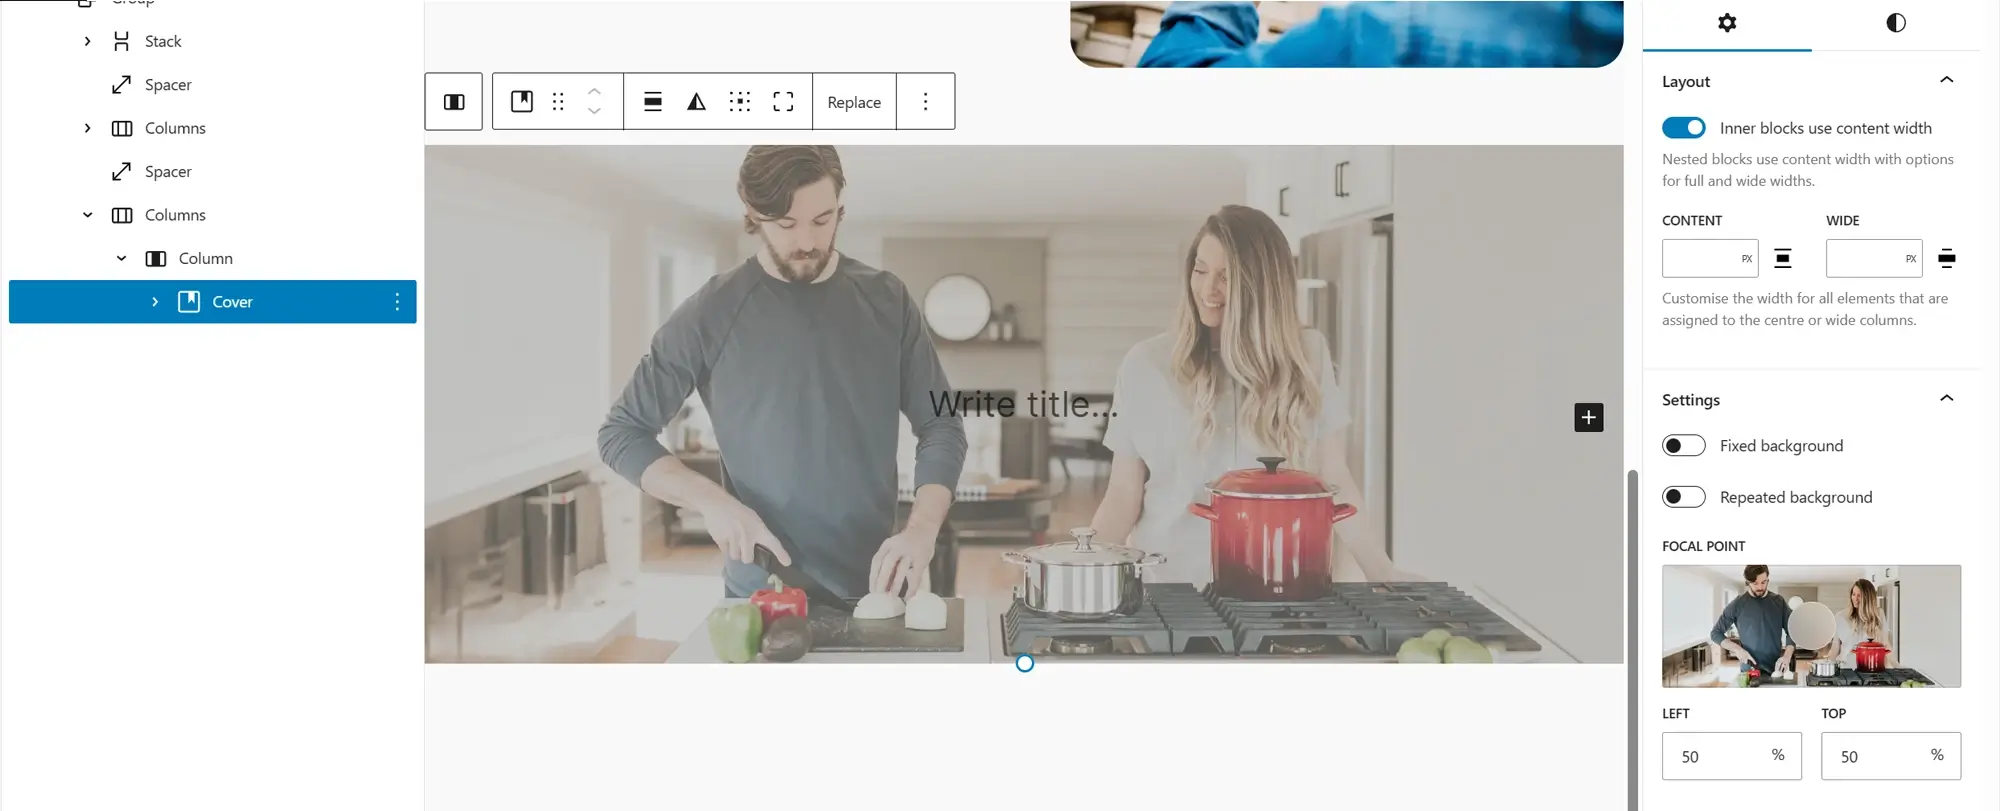
Design standout sections with the cover block
19. WordPress cover block
Description
Add background images or videos with overlay text and buttons.
The cover block allows you to place text, buttons, or other content over a background image or video making it perfect for banners, headers, and call-to-action sections.
Key features of the cover block:
- Use an image, video, or solid color as the background
- Add a color overlay to enhance text visibility
- Customize alignment, width, and padding
- Enable fixed background for a parallax effect
- Select a focal point to highlight key image areas
- Add nested blocks like headings, buttons, or paragraphs
To use it, insert the cover block, upload or select a media file, and layer your content over it. For the best results, use overlays for readability, apply brand colors, and experiment with layout settings.
The cover block adds a modern, polished feel to your site and is ideal for grabbing attention in high-impact areas.
20. Gallery block
Description
Display images in a customizable gallery format.
The gallery block lets you create image galleries with flexible layout options, making it easy to showcase photos in an organized, responsive format.
Key gallery settings include:
- Set number of columns (1–8)
- Enable or disable cropping for uniform image size
- Link to media files, attachment pages, or disable linking
- Choose image sizes (thumbnail, medium, large, full)
- Add alt text for accessibility
- Enable lightbox-style viewing on click
- Customize borders, filters, and alignment options
To add a gallery block, click the plus icon or type /gallery, then upload or choose images from the media library. Adjust settings in the sidebar or block toolbar to fine-tune layout and design.
The gallery block is ideal for portfolios, blog photo sections, or event highlights and requires no additional plugins for basic image grids.
21. Media & text block
Description
Combine images and text side by side for engaging content layouts.
The media & text block helps you create visually balanced layouts by placing media (image or video) next to text. It’s perfect for highlighting products, features, testimonials, or team profiles.
How it works:
- Add the block via the inserter or by typing /media & text
- Upload or choose media, then enter your text in the paragraph area
- Swap sides to place media on the left or right
- Resize images and adjust alignment
- Stack content vertically on mobile for responsiveness
- Add background colors, alt text, or custom CSS classes
This block is especially effective for storytelling, content sections, or marketing pages. It’s simple to use and enhances visual interest while maintaining clarity and readability.

22. WordPress button block
Description
Add custom buttons with adjustable styles and links.
The button block allows you to create customizable call-to-action buttons in your WordPress pages or posts. These interactive elements help guide users to take actions like visiting a link, submitting a form, or downloading a file.
Key features of the button block:
- Customizable button text and link URL
- Style options for color, shape, and typography
- Alignment controls (left, center, right, wide, full)
- Justification and vertical alignment options
- Advanced settings for HTML anchors, link rel attributes, and custom CSS classes
- Ability to transform into a group or columns block for layout flexibility
To add a button block, open the block inserter, search for Buttons, or type /buttons in the editor. Once added, customize it using the sidebar settings and toolbar options to match your site’s style and layout needs.
23. Spacer block
Description
Add space between blocks to improve layout and readability.
The spacer block helps you add vertical spacing between blocks to enhance the overall visual flow and readability of your page. It gives you control over white space without needing custom code or CSS.
You can adjust the spacer’s height using:
- Drag handles
- Numeric input (pixels, %, em, rem, vw, vh)
- Advanced settings like CSS classes or HTML anchors
To insert a spacer, use the inserter or type /spacer in the editor. It’s best used between sections or visual elements (not paragraphs), and keeping spacing consistent improves overall layout quality.
Use the spacer block thoughtfully to separate content areas and avoid clutter, while maintaining balance in your page design.
24. Social icons block
Description
Include social media icons with links to your profiles.
The social icons block lets you add professional-looking links to your social media accounts, making it easy for visitors to connect with you across platforms.
To add it, use the block inserter or type /social. Once inserted, click the plus sign to add icons from over 40 supported networks, and enter the corresponding URLs.
Customization options include:
- Style variations like pill shape, logos only, and color schemes
- Size and spacing adjustments
- Open links in a new tab
- Show or hide icon labels
- Rearranging icons via drag-and-drop
The social icons block is a great way to increase visibility across channels and strengthen your online presence, while blending seamlessly into your site’s branding and design.

Engage users with embedded video content
25. WordPress video block
Description
Embed videos from various sources with playback controls.
The video block allows you to embed videos directly into your posts or pages using a simple and intuitive interface. You can upload videos, embed them from platforms like YouTube or Vimeo, or select files from your media library.
Key features of the video block:
- Upload video files or insert from media library
- Embed external video URLs from YouTube, Vimeo, and more
- Control settings like autoplay, loop, and mute
- Add a poster image (thumbnail preview)
- Adjust alignment and dimensions
- Toggle visibility of playback controls
To add a video block, click the plus icon, search for video, or type /video in the editor. Once added, configure the settings in the sidebar to control playback behavior and presentation.
The video block helps make your content more engaging, especially for tutorials, product demos, and marketing messages.
26. Audio block
Description
Embed audio files with playback controls.
The audio block lets you embed and play audio files directly within your WordPress content. This is perfect for podcasts, voice notes, music samples, or background sound.
You can upload audio files, select them from your media library, or embed content from external sources like SoundCloud.
Key features of the audio block:
- Upload or embed audio files easily
- Built-in player with play/pause, progress bar, and volume control
- Sidebar settings for autoplay, loop, mute, and preload behavior
- Custom width and alignment options
- Support for external services like SoundCloud (via embed)
To add it, type /audio or find audio in the block inserter. The audio block offers a simple way to enrich your posts with sound, enhancing storytelling and user engagement.
27. Embed block
Description
Embed content from external sites, including social media posts and videos.
The embed block allows you to display content from third-party sites directly within your WordPress post or page. You can use it to showcase videos, social media posts, audio clips, and more without needing a plugin or iframe code.
To use it, add an embed block by typing /embed, then paste the URL of the content you want to include. WordPress will automatically convert the URL into a live preview.
Supported platforms include:
- YouTube, Vimeo
- Twitter (now X), Facebook, Instagram
- SoundCloud, Spotify
- TikTok, Pinterest
- And many more
Toolbar options let you adjust alignment, edit the embed URL, or transform the block into another layout. Use embed blocks to enrich your content and integrate social proof, external media, or live updates with ease.
Use tables to display structured content clearly
28. Table block
Description
Create tables for structured data presentation.
The table block allows you to create and customize tables directly within your WordPress content. It’s ideal for presenting data in a clear, organized format without needing custom HTML.
To use the block, click the + icon, search for table, and choose the number of rows and columns. Then, fill in your content.
Key features of the table block:
- Add header and footer rows
- Choose between default or striped styles
- Enable fixed-width cells
- Customize font size, color, alignment, borders, and background
- Adjust padding and cell spacing
The table block makes it easy to present comparison data, schedules, pricing plans, or structured information that enhances content clarity and accessibility.
29. List block
Description
Add ordered or unordered lists with customizable styles.
The list block lets you create numbered (ordered) or bulleted (unordered) lists. Lists help improve content structure, making it easier for users to scan and understand information.
To insert a list block, type /list or add it via the inserter. You can:
- Nest list items for multi-level lists
- Switch between ordered and unordered formats
- Apply styling like bold, italic, or inline links
- Adjust font, spacing, and alignment
Use list blocks to organize steps, summarize features, or enhance readability perfect for tutorials, product highlights, and resource roundups.
30. Quote block
Description
Highlight quotes with customizable formatting.
The quote block lets you showcase quotations, testimonials, or key phrases by giving them visual emphasis. It separates highlighted text from the rest of your content to draw attention.
You can:
- Add a citation or source for the quote
- Customize font size, color, alignment, and borders
- Choose between default and stylized quote designs
- Add background colors or adjust padding for visual contrast
Use the quote block to display customer testimonials, famous quotes, or impactful statements that enhance your content’s credibility and appeal.
31. Code block
Description
Display code snippets with syntax highlighting.
The code block allows you to insert formatted code into your content without WordPress modifying its structure. It’s especially useful for developers, bloggers, and educators sharing code samples.
Key features include:
- Displays raw code exactly as entered
- Prevents automatic formatting or interpretation
- Works for HTML, CSS, JavaScript, and more
- Offers optional line breaks and preformatted spacing
- Supports custom CSS classes for styling
To add a code block, type /code or select it from the block inserter. It’s perfect for technical documentation, tutorials, or showcasing custom snippets in a clean, readable format.
Preserve formatting with preformatted blocks
32. Preformatted block
Description
Preserve text formatting for code or special text layouts.
The preformatted block allows you to display text exactly as it’s typed, preserving spaces, tabs, and line breaks. It’s ideal for content that requires precise formatting, such as code samples, poetry, ASCII art, or any structured text.
Unlike the paragraph block, the preformatted block uses a monospace font and maintains all your original formatting, making it great for technical or artistic layouts.
Key features:
- Retains line breaks and spacing exactly as entered
- Uses monospace font for better alignment
- Supports links, custom text colors, and background styling
- Offers advanced settings like custom CSS classes and HTML anchors
To add it, click the + icon, search for preformatted, or type /preformatted. Then, type or paste your content and apply any desired styling.
33. Pullquote block
Description
Highlight important quotes with stylish formatting.
The pullquote block is designed to emphasize standout quotes, testimonials, or key points by displaying them with enhanced visual styling.
It’s often used in long-form content or blog posts to draw attention to meaningful or impactful phrases.
Key features:
- Choose between default and solid color styles
- Customize alignment (left, center, right)
- Adjust typography, accent lines, and background colors
- Add an optional citation or source
- Style the border and spacing to match your site’s design
To insert a pullquote, type /pullquote or find it in the inserter. Enter your quote and citation, and then personalize the look with your brand’s styles.
34. Latest posts block
Description
Automatically display your most recent blog posts.
The latest posts block dynamically pulls your newest blog entries and displays them anywhere on your site. It’s perfect for blog landing pages, sidebars, or homepage updates.
Key features:
- Set how many posts to display
- Choose between list or grid view
- Show or hide post date, author, featured image, and excerpts
- Adjust layout columns and featured image size
- Filter posts by category or author
To add the block, search for latest posts in the inserter or type /latest-posts. The block will auto-populate with your most recent content based on your chosen settings.
It’s a simple and powerful way to keep your content fresh and accessible across your website.
35. Post title block
Description
Display the title of the current post or page dynamically.
The post title block is used within templates to automatically display the title of the current page, post, or custom post type. It ensures that your design remains consistent across all content types.
Key features:
- Choose HTML heading level (h1, h2, h3, etc.)
- Enable or disable linking to the post permalink
- Add custom prefixes or postfixes to the title
- Adjust typography, text color, spacing, and alignment
- Apply background color, borders, or CSS classes
Add the post title block by typing /post title or selecting it from the inserter. It works seamlessly with the site editor and is essential for customizing templates or single post layouts.
Keep your homepage fresh with latest posts
36. Post content block
Description
Show the content of the current post or page.
The post content block dynamically displays the main content of a post or page within a query loop block. It’s used to render the full content of each post being pulled by the loop and can only be added as a child block within a query loop.
To use it, insert a query loop block, then type /post-content or use the inline inserter. Once added, you can customize layout width, text justification, font size, and CSS classes from the block settings sidebar.
Key use cases:
- Blog archives
- Category pages
- Custom post type templates
This block ensures your site templates can display rich post content automatically, while still fitting into your theme’s layout and design.
37. Post excerpt block
Description
Display an excerpt from the current post or page.
The post excerpt block allows you to show a short summary of a post’s content within a query loop. It’s often used on blog index pages or archive templates to encourage users to click through to full articles.
To insert it, first add a query loop block, then type /post-excerpt to add the block within the loop.
Customization options include:
- Adjusting excerpt length
- Displaying or hiding a read more link
- Styling text and background colors
- Setting font size, spacing, and alignment
- Adding custom CSS classes
If a post doesn’t have a manually written excerpt, WordPress will automatically display the first 55 words of the post content, though this can be adjusted with the max number of words setting.
38. Post featured image block
Description
Show the featured image of the current post or page.
The post featured image block displays the featured image assigned to a post or page, often within a query loop layout or template. It’s a valuable tool for improving visual engagement and highlighting content.
To use the block, insert it into your layout typically inside a query loop. If a featured image hasn’t been set for a post, you’ll have the option to upload or choose one from the media library.
Key features:
- Set image size (thumbnail, medium, large, full)
- Adjust alignment (left, center, right)
- Link the image to the post permalink
- Add overlays and adjust opacity
- Apply custom CSS classes or HTML anchors
Use this block to build image-rich blog pages, featured article sections, or visual content grids that improve aesthetics and engagement across your site.
Render full content using the post content block
39. Post date block
Description
Display the publication date of the current post or page.
The post date block automatically displays when a post or page was published. It’s often used in blog templates, archives, or single post layouts to give readers a time reference.
To use it, add the block in your layout or query loop. It will pull the date from the current post automatically.
Customization options include:
- Choose from predefined or custom date formats
- Align the date (left, center, right)
- Enable or disable linking the date to the post’s permalink
- Adjust text color and typography
- Add HTML anchors and CSS classes for advanced styling
If you prefer to display the last updated date instead of the published date, consider using the post modified date block or applying custom logic with a plugin or theme.
40. Post categories block
Description
Show the categories assigned to the current post or page.
The post categories block displays a list of categories associated with a post. It’s helpful for improving navigation, organizing your content, and guiding users to related topics.
To insert it, type /post categories or add it from the block inserter. It automatically pulls the categories assigned to the post it’s placed in.
Customization features include:
- Choose between list or dropdown display
- Enable links to category archive pages
- Customize the separator (e.g., comma, bullet, slash)
- Adjust typography, spacing, and color
- Add HTML anchors or custom CSS classes
This block supports hierarchical category structures and displays both parent and child categories when applicable.
41. Post tags block
Description
Display the tags assigned to the current post or page.
The post tags block shows the tags linked to a specific post or page, offering another way for visitors to explore related content based on specific keywords or topics.
To add it, search for post tags or type /post tags into the editor.
Customization options:
- Choose HTML wrapper tag (div, p, span)
- Define separator characters (e.g., |, ·, ,)
- Enable or disable tag links to archive pages
- Add prefixes or postfixes
- Customize text style, color, and typography
- Include UTM tracking parameters for linked tags
- Apply advanced CSS classes or anchors
Tags are non-hierarchical and are displayed in the order they were assigned. The post tags block helps users discover related posts and enhances content categorization.
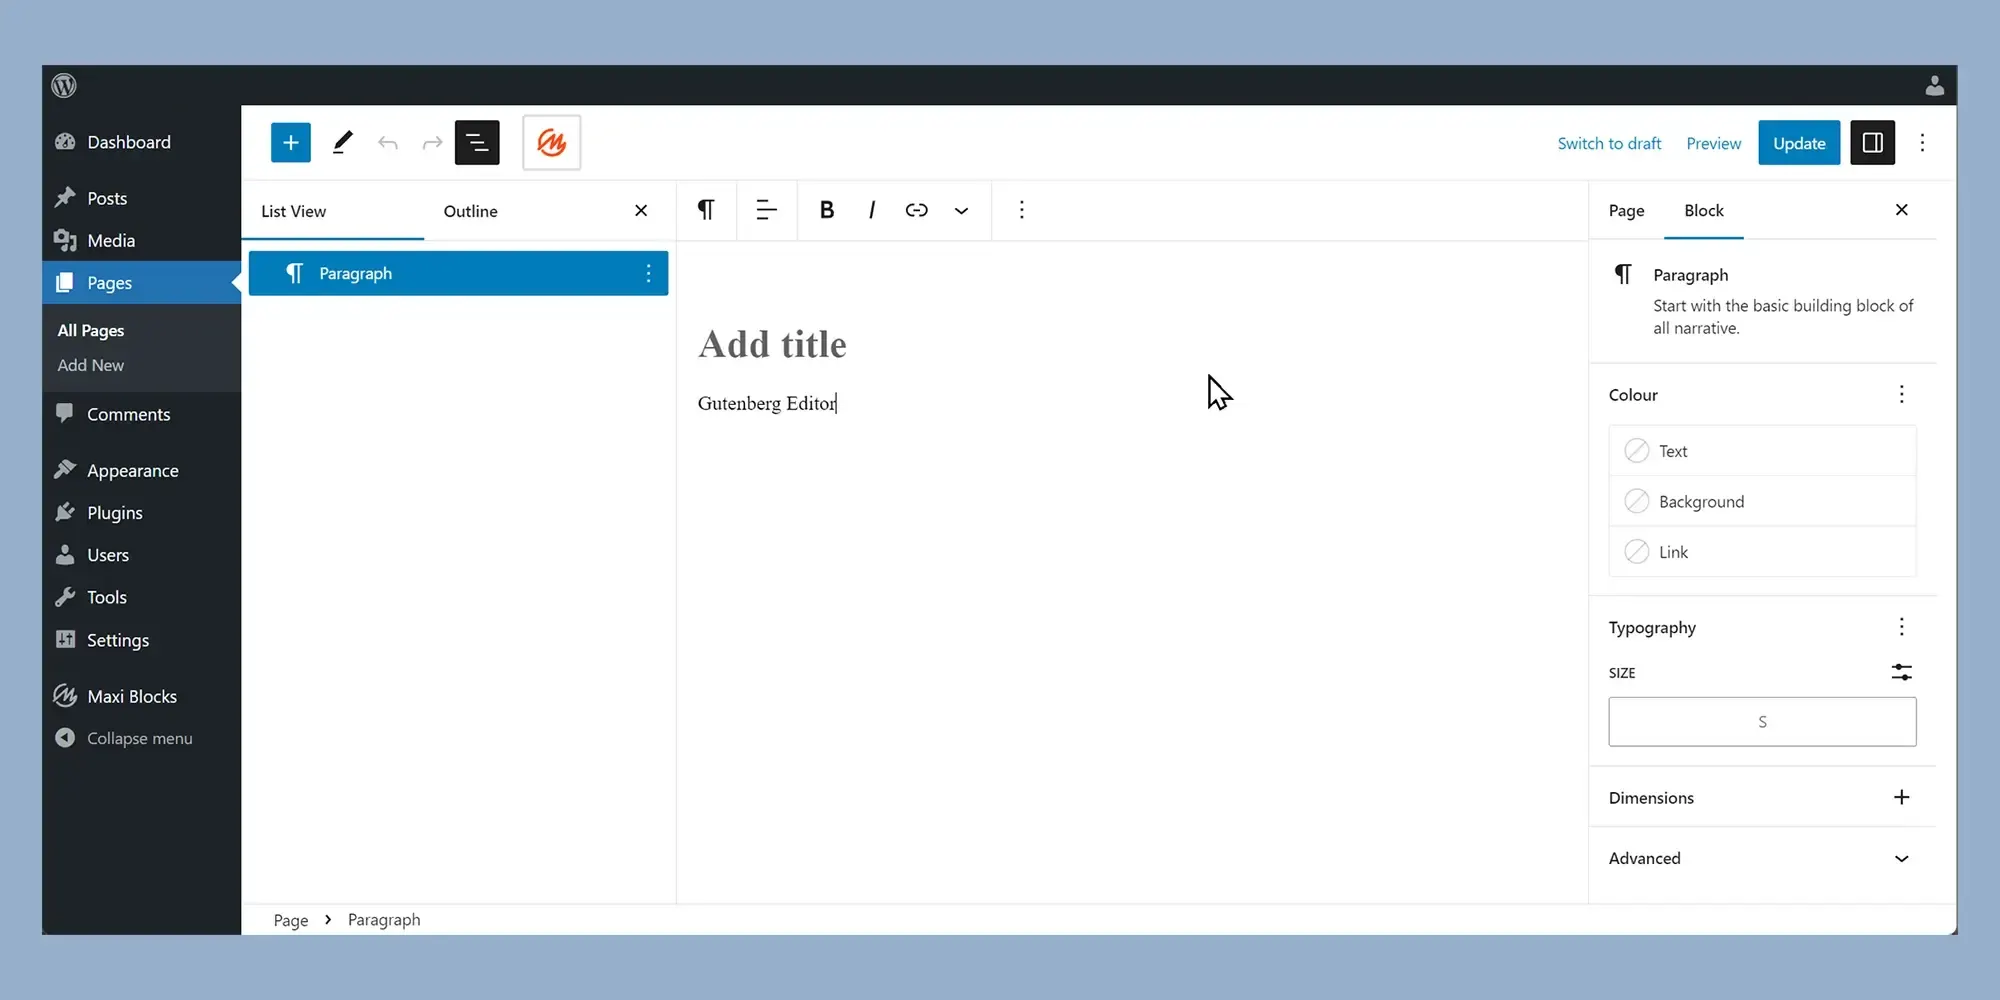
Reinforce your brand with the site title block
42. Site title block
Description
Display the title of your site dynamically.
The site title block allows you to display your website’s name dynamically, pulling the title from your WordPress settings. It’s typically used in headers or theme templates, providing consistent site branding across pages.
To insert the site title block, search for site title in the inserter or type /site-title in the editor. It will automatically display the title set under Settings > General.
Customization options include:
- Set font size, alignment, and color
- Link the title to your homepage
- Adjust spacing and typography
- Add custom CSS classes or HTML anchors
Note: The post title block is better suited for individual posts or pages, while the site title block is ideal for site-wide templates like headers and footers.
43. Site tagline block
Description
Show the tagline of your site.
The site tagline block displays the descriptive text associated with your website usually placed near your logo or site title. It pulls the tagline from your general site settings and updates automatically across all templates where it appears.
To use it, insert the block using /site-tagline or find it in the block inserter.
Sidebar customization options include:
- Typography settings (size, font, weight)
- Text and background color
- Padding, margin, and spacing controls
- Add HTML anchors and custom CSS classes
Changes to the tagline in this block reflect wherever it’s used and also affect browser title bars and search snippets. It’s a great way to communicate your site’s purpose with a branded, consistent line of text.
44. Site logo block
Description
Display your site’s logo with customizable settings.
The site logo block allows you to add your brand logo to your site easily whether on a header, homepage, or global template.
To insert it, search for site logo in the block inserter or type /site-logo. You can upload a new image or select one from your media library. If no logo is set, a placeholder will appear.
Customization options include:
- Set logo width and aspect ratio
- Choose between default or rounded logo shapes
- Link the logo to your homepage
- Control spacing, alignment, and dimensions
- Enable the logo as the site icon (browser tab icon)
- Add CSS classes for advanced styling
The site logo block ensures consistent branding and visual identity across your WordPress site and is a must-have element for modern, block-based theme designs.
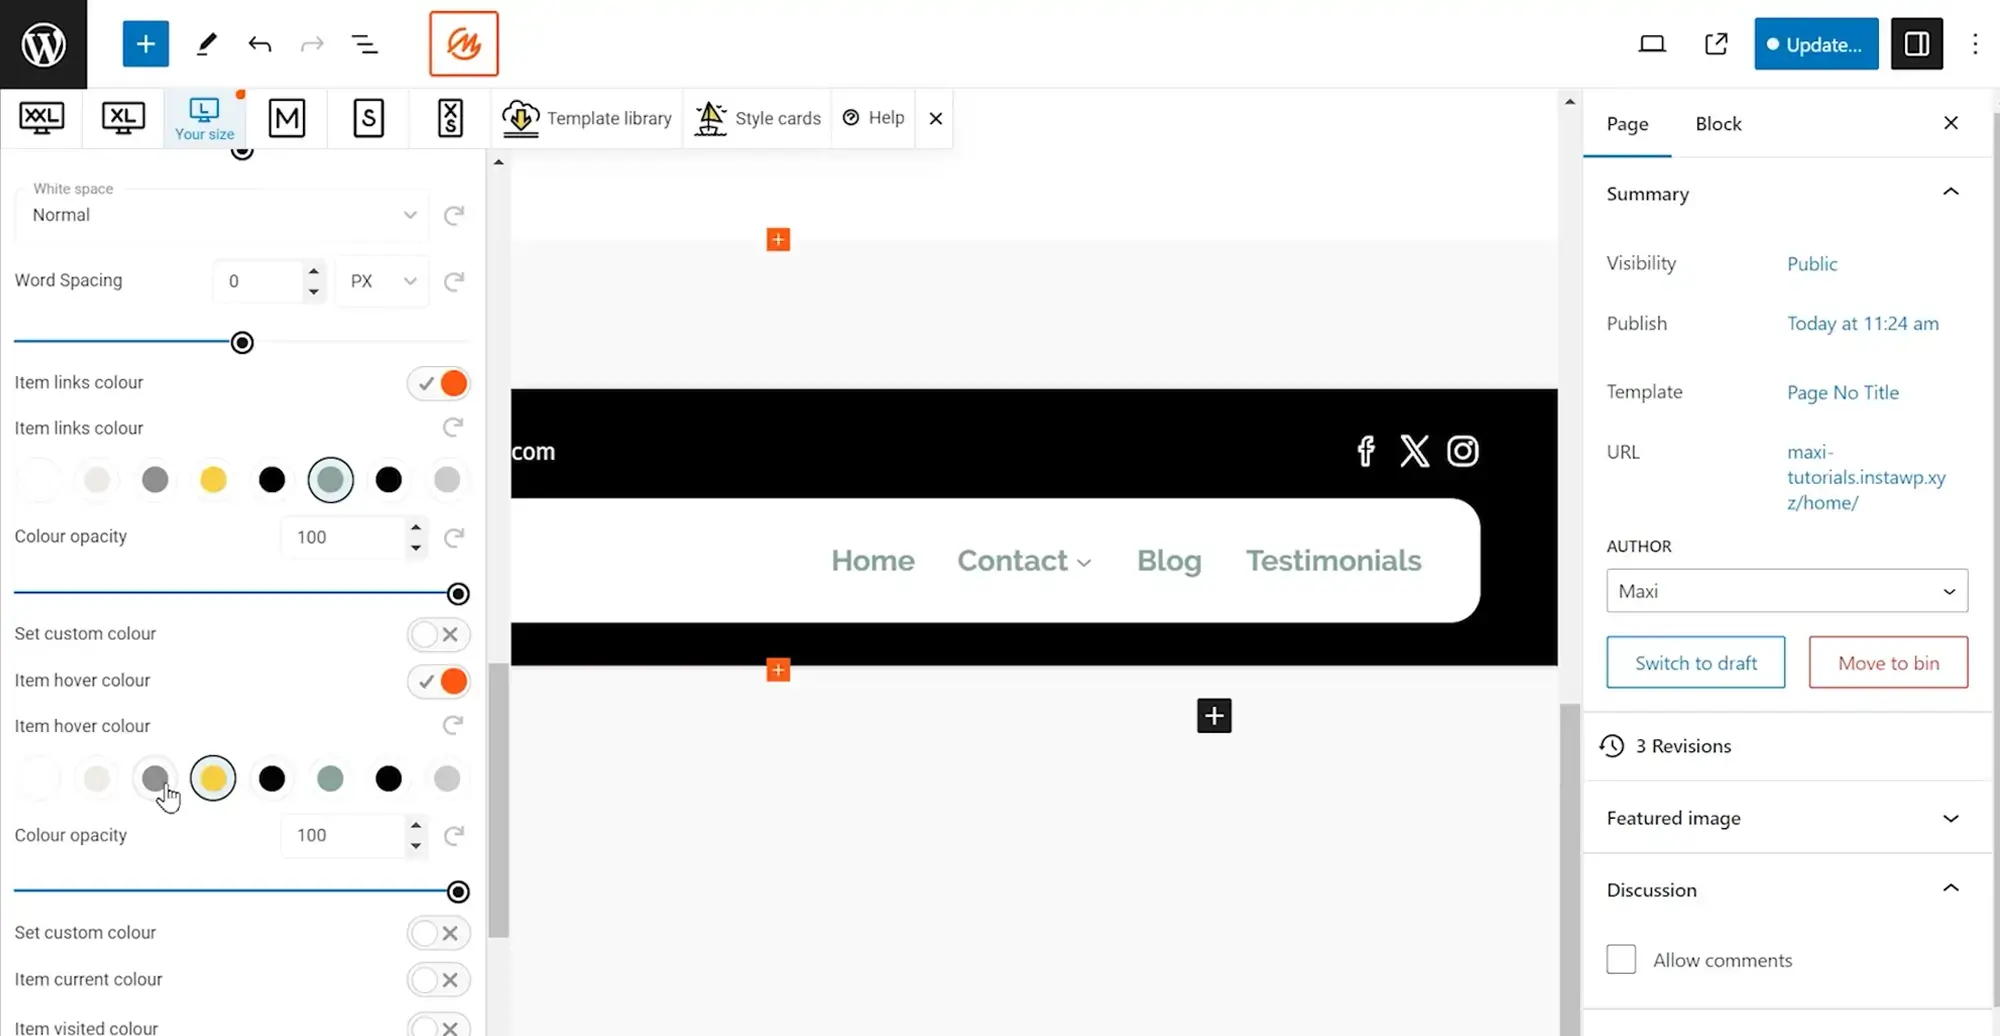
Guide visitors with the archive title block
45. Archive title block
Description
Show the title of archive pages dynamically.
The archive title block dynamically displays the title of archive pages such as category, tag, author, date, or custom taxonomy archives. It’s commonly used in template files to give context to archive listings.
To use it, insert the block with /archive-title or select it from the inserter. The block will automatically pull and display the correct archive name based on the current page.
Customization options include:
- Set the heading level (H1–H6)
- Adjust alignment and spacing
- Change text and background colors
- Apply typography settings (font, size, weight)
- Add custom CSS classes or HTML anchors
This block improves navigation and context for archive pages, helping users better understand the structure of your content.
46. Search block
Description
Add a search bar to your site for easy navigation.
The search block adds a search form to your site, allowing visitors to quickly find relevant content. It can be placed in headers, sidebars, footers, or within templates.
To insert the block, type /search or locate it in the inserter.
Key features:
- Custom placeholder or label text
- Show or hide the submit button
- Choose between text or icon for the button
- Adjust button position (inline or below)
- Customize field and button colors, borders, and typography
- Set field width and alignment
- Add CSS classes for further styling
This block searches content within your WordPress site only, not external websites. It significantly enhances user experience by making your content more accessible.
Final thoughts
WordPress full site editing (FSE) gives you powerful tools to build dynamic, visually rich, and fully customizable websites without writing code. Whether you’re a beginner or a seasoned developer, these 46 features provide a robust foundation for building professional-grade WordPress sites with ease and flexibility.
From dynamic blocks like post content, query loops, and featured images, to design tools like the site logo, global styles, and block patterns, FSE empowers you to take control of every part of your site.
If you’re just getting started, consider reading a beginner-friendly guide on using a WordPress website builder. Platforms like MaxiBlocks provide helpful comparisons of different builders, along with tools and templates to streamline the design process.
For businesses or creatives who want expert guidance, WordPress website designers can help tailor your site to your brand, while still leveraging the power of FSE.
By mastering these features and choosing the best website builder for WordPress, you’ll be equipped to create modern, fast, and scalable websites with full creative control.
Full site editing tools and resources for WordPress
Browse full site editing tutorials and resources to design faster, smarter, and without coding.
FAQs for WordPress Full Site Editing (FSE)
What is WordPress Full Site Editing (FSE)?
WordPress Full Site Editing (FSE) is a collection of features that allow users to design and customize their entire website using blocks. It provides more flexibility and control over site design, enabling users to edit global elements like headers, footers, sidebars, and more through a unified block-based interface.
How does WordPress full site editing differ from the traditional editor?
FSE lets you modify the entire site’s structure and design, while the traditional editor focuses on content within posts and pages.
What are the benefits of using WordPress full site editing?
FSE provides greater customization, a unified editing experience, and the ability to use blocks for all site elements.
Do I need a specific theme for WordPress full site editing?
Yes, you need a block theme that supports full site editing.
How do I enable WordPress full site editing?
FSE is enabled by default in WordPress 5.8 and later with a compatible block theme. Access it via the Site Editor in the dashboard.
Can I switch back to the traditional editor after using WordPress full site editing?
Yes, you can switch back by using a non-FSE theme, though some changes may not be compatible.
Is WordPress full site editing suitable for beginners?
FSE can be complex initially but offers powerful customization tools. Beginners can benefit from its flexibility with some learning.
What are block patterns in WordPress full site editing?
Block patterns are pre-designed collections of blocks for quickly creating complex layouts.
Can I use third-party blocks with WordPress full site editing?
Yes, third-party blocks from compatible plugins can be used with FSE.
Where can I learn more about using WordPress full site editing?
You can find more information in the WordPress documentation, tutorials, and community forums.
What is a block theme in WordPress full site editing?
A block theme is a theme designed to fully support the capabilities of FSE, allowing block-based design across the entire site.
How does WordPress full site editing impact theme development?
FSE changes theme development by encouraging block-based design, making themes more flexible and customizable.
What are template parts in WordPress full site editing?
Template parts are sections of a template that can be reused across multiple templates, like headers or footers.
How do I create a custom header with WordPress full site editing?
Use the Site Editor to add and customize a header block within your template.
Can I edit my site’s footer with WordPress full site editing?
Yes, you can fully customize your site’s footer using blocks in the Site Editor.
What is the Site Editor in WordPress full site editing?
The Site Editor is the interface within WordPress where you can manage and customize all aspects of your site using blocks.
Are there any limitations to WordPress full site editing?
While powerful, FSE is still evolving and may lack some advanced customization features found in traditional themes.
How do global styles work in WordPress full site editing?
Global styles allow you to set consistent styling (like colours and fonts) across your entire site from a single location.
Can I use WordPress full site editing for e-commerce sites?
Yes, but ensure your e-commerce theme supports FSE and that your plugins are compatible.
How does WordPress full site editing affect performance?
FSE can improve performance by reducing reliance on multiple plugins and simplifying the design process through blocks. However, excessive use of blocks might impact load times, so optimize accordingly.
WordPress itself
Official Website
wordpress.org – This is the official website for WordPress, where you can download the software, find documentation, and learn more about using it.
WordPress Codex
codex.wordpress.org/Main_Page – This is a comprehensive documentation resource for WordPress, covering everything from installation and configuration to specific functionality and troubleshooting.
WordPress Theme Directory
wordpress.org/themes – The official WordPress theme directory is a great place to find free and premium WordPress themes. You can browse themes by category, feature, and popularity.
maxiblocks.com/go/help-desk
maxiblocks.com/pro-library
www.youtube.com/@maxiblocks
twitter.com/maxiblocks
linkedin.com/company/maxi-blocks
github.com/orgs/maxi-blocks
wordpress.org/plugins/maxi-blocks