How do I add a favicon to my WordPress site?
Try MaxiBlocks for free with 500+ library assets including basic templates. No account required. Free page builder, theme and updates included. Start now
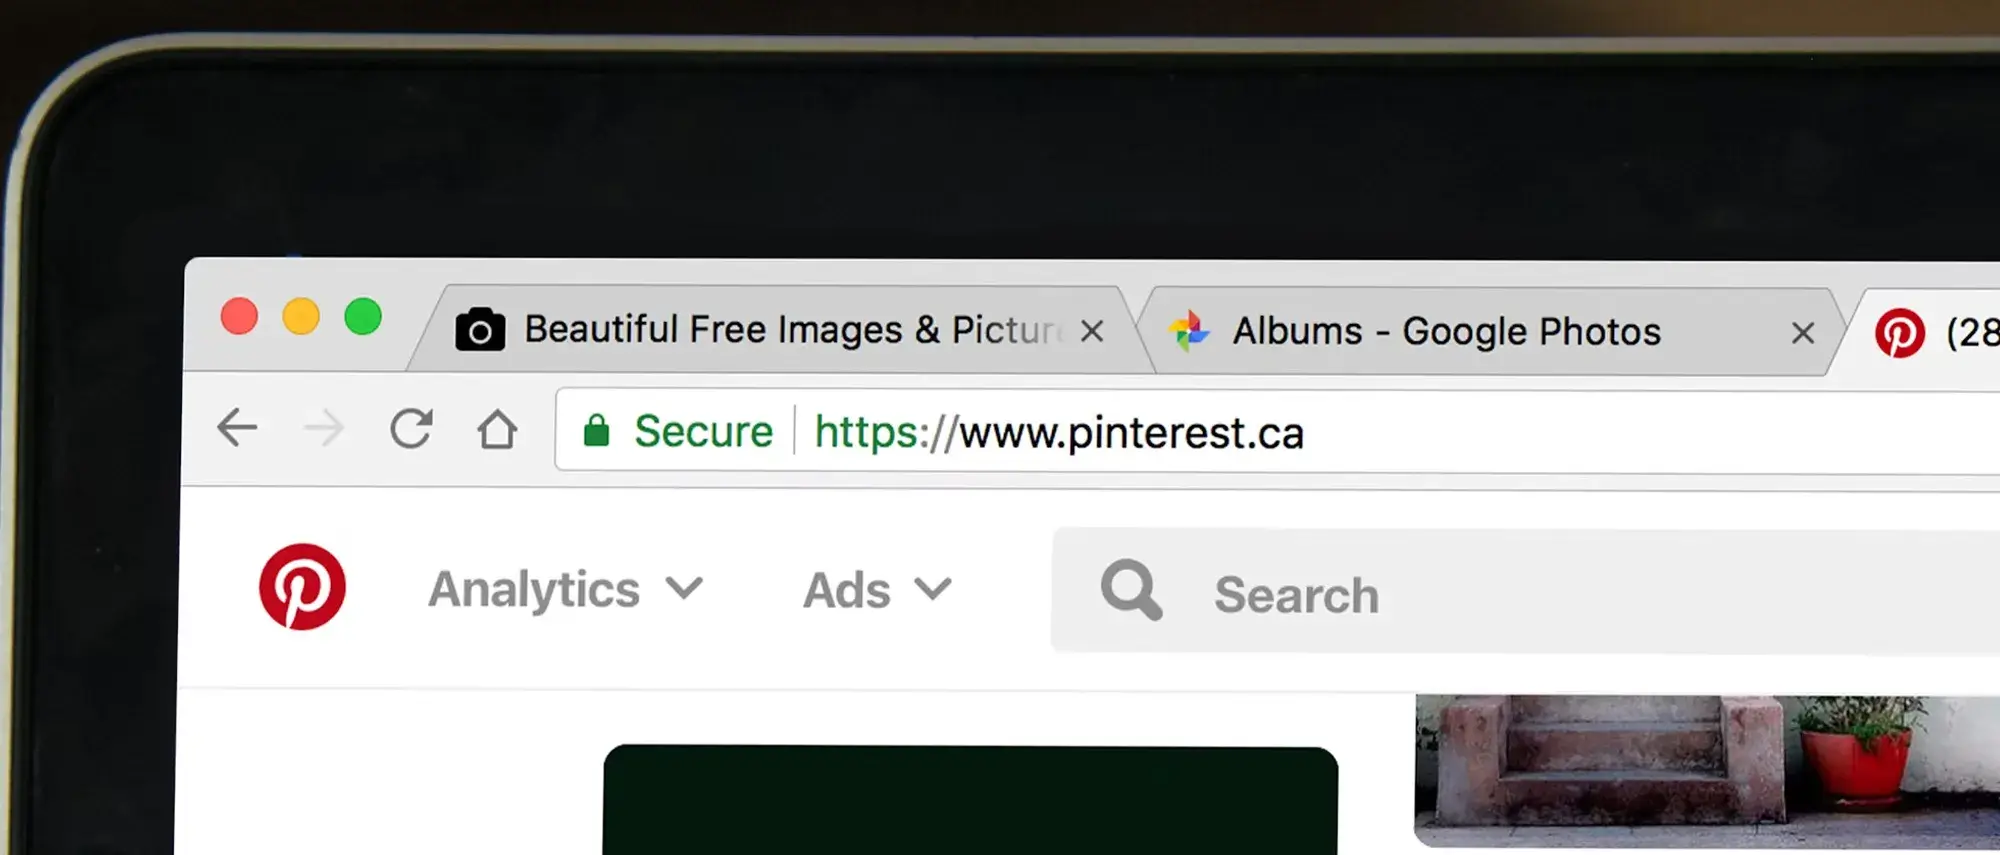
Adding a favicon to your WordPress site is a simple process that significantly boosts your site’s professional appearance. A favicon is the small icon that appears in browser tabs, bookmarks, and address bars next to your website’s name. WordPress offers built-in functionality to add a favicon, or you can opt for a dedicated favicon plugin. Stay tuned for a step-by-step guide on both methods!
10 Effective ways to add a favicon to your WordPress site
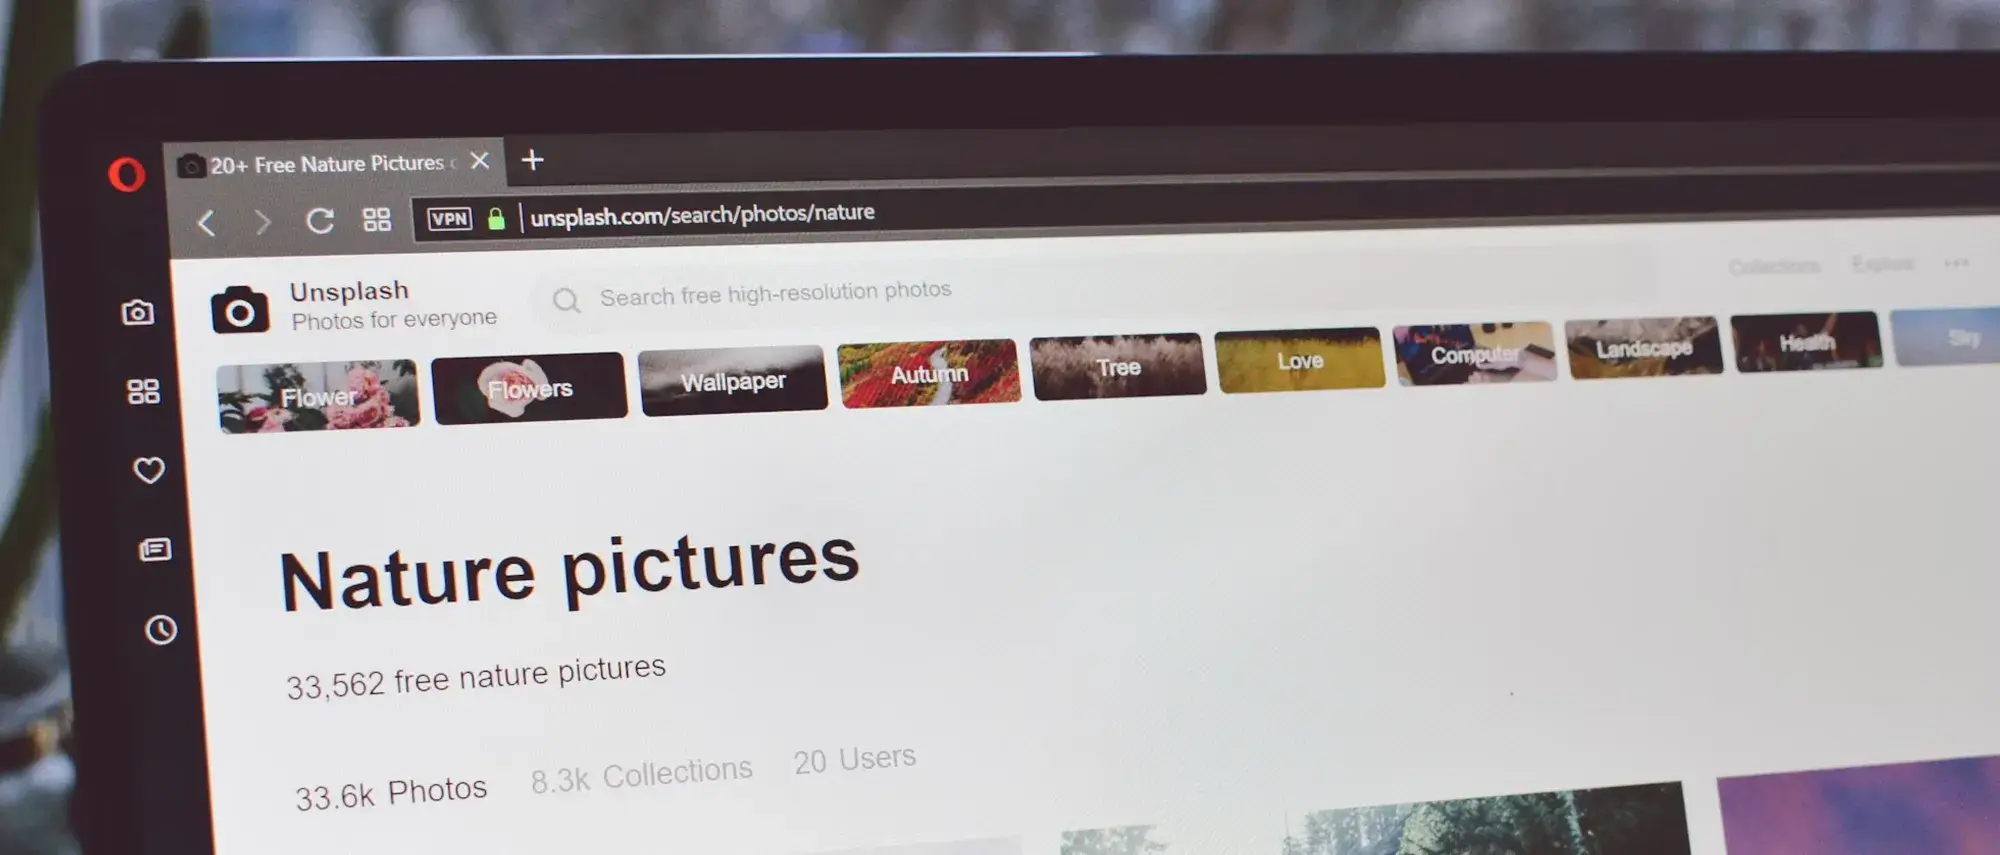
A favicon, short for “favourites icon,” is that little image you see next to a website’s name in your browser tab or bookmark list.
Here’s why having a favicon is important:
Branding: A well-designed favicon acts as a miniature brand ambassador, reinforcing your website’s identity in a subtle yet impactful way. Every time someone sees your favicon, it reminds them of your brand, fostering recognition and trust.
User experience: With multiple tabs open at once, a favicon becomes a visual cue, helping users quickly identify and switch to your website. This improves navigation and saves them time searching for the right tab.
In short, a favicon is a small investment that yields big returns in terms of brand recall and user satisfaction.
Section 1: Using the WordPress customizer
Adding a favicon, also known as a site icon, to your WordPress site is easy and can make a big difference in how your site is perceived and used. You don’t need to know any coding to do it, thanks to the WordPress Customizer. Here’s a step-by-step guide on how to add your favicon, along with some tips to make sure it looks good on all devices.
Adding a favicon with the WordPress customizer
1. Access your WordPress dashboard: Begin by logging in to the administration area (backend) of your WordPress website.
2. Navigate to the customization tools: Once logged in, look for the Appearance menu in the sidebar of your dashboard. Hover over Appearance and click on the Customize option.
3. Find the site identity section: The customizer interface should display various options for customizing your website’s look and feel. Look for a section labelled site identity. This section holds key elements that define your website’s identity, such as the site title, tagline, logo, and most importantly for our purpose, the Site Icon (favicon). Click on Site Identity to access its settings.
4. Upload your favicon image: Within the site identity settings, scroll down until you find the Site Icon section. Click on the button labelled Select site icon. This will open your WordPress Media Library, where you can choose an existing image or upload a new one directly from your computer.
WordPress best practices: Keep in mind that WordPress recommends using a square image with dimensions of at least 512×512 pixels for optimal favicon display. This ensures your favicon appears clear and sharp across different devices and browsers.
5. Crop and publish your favicon: Once you’ve chosen or uploaded your favicon image, you might be given the option to crop it. Since favicons are typically square, make any necessary adjustments using the cropping tool to ensure your image fits neatly within the square area. When you’re satisfied with the crop, click Crop Image.
Finally, take a moment to preview your website in the Customizer to confirm how the favicon appears. Click the publish button to make your new favicon live on your website.
Section 2: Theme settings
Many WordPress themes have built-in options for adding or changing a favicon, providing an approach for users who prefer to manage website icons directly through their theme’s settings. These options are usually found in the theme’s customization settings and offer an alternative to the WordPress Customizer or manual methods. Below, you’ll learn how to explore these theme-specific favicon options and find some examples of popular themes that support this feature.
Adding a favicon through theme options
While the WordPress Customizer offers a convenient method, some themes might provide built-in options for adding a favicon. Here’s how to navigate these theme-specific settings:
1. Locate Your Theme’s Customization Menu: Login to your WordPress dashboard. Navigate to the Appearance menu in the sidebar.
Look for options related to theme customization. These might be labeled “Theme Options,” “Customize,” “Theme Settings,” or something similar. The exact name depends on your specific theme.
2. Find the Favicon Settings: Within the theme options menu, explore for sections related to your website’s identity or branding. These might be labeled “Site Icon,” “Favicon,” “Website Icon,” or similar terms. The specific label can vary based on your theme.
Tip: If you encounter difficulty finding the favicon settings, consult your theme’s documentation or search for help on its support forums. Often, theme developers provide detailed instructions for using their theme’s features.
3. Upload and Save Your Favicon: Once you’ve located the favicon settings, you’ll typically find an upload option.
Examples of themes with integrated favicon support
Divi: Divi by Elegant Themes is known for its visual builder and extensive customization options and offers an option to upload a website icon directly from the theme options panel.
Astra: Astra is a popular, lightweight theme that allows users to add a favicon through the customization settings. The process is intuitive, so even inexperienced users can easily update their site icon.
Avada: One of the best-selling WordPress themes, Avada offers a comprehensive options panel, including the ability to upload a custom favicon for your site directly through the theme settings.
OceanWP: OceanWP is another theme that offers extensive customization options, including a simple interface for uploading your favicon without having to deal with the WordPress Customizer.
GeneratePress: GeneratePress focuses on speed and ease of use and offers straightforward options for managing your website’s favicon in the theme settings.
Best practices when using theme settings for favicons
Follow the theme guidelines: Different themes may have specific recommendations for favicon sizes and formats. Always check your theme’s documentation to make sure your favicon follows these guidelines.
Consistency: Make sure your favicon is consistent with the overall design and branding of your website, even if you change themes. This consistency will help maintain brand recognition and trust with your visitors.Save: Before making any changes, especially when switching themes or updating theme settings, you should back up your website. This precaution ensures that you can restore the appearance of your website if something goes wrong.
Section 3: Installing a plugin for favicon management
WordPress plugins extend the functionality of your site with additional features. When it comes to managing your site’s favicon, several plugins can simplify the process, providing more flexibility and options beyond the default WordPress capabilities. This section explores recommended plugins for favicon management and guides you through their installation and configuration.
Plugin recommendations
Favicon by RealFaviconGenerator: This plugin focuses exclusively on managing favicons and offers comprehensive options for creating and deploying favicons for all platforms and devices. It automatically generates favicons for iOS, Android and desktop browsers and ensures that your website icon looks perfect everywhere.
All in One Favicon: A simple and effective plugin that supports a wide range of file types, including .ico, .png, .gif and even .svg, allowing you to easily add a favicon to the front end of your website, admin area and even your login page, creating a cohesive brand experience.
WP Site Icon: Designed specifically for ease of use, WP Site Icon makes adding and updating the favicon for your WordPress website simple. With just a few clicks, you can upload your site icon and the plugin will take care of the rest so that your favicon is visible on all devices and browsers.
Installation and configuration
Step 1: Select and install your plugin: Navigate to your WordPress dashboard and click on “Plugins” > “Add new”. Search for the name of the plugin in the search bar (e.g. “Favicon by RealFaviconGenerator”). Once you have found the plugin, click on “Install now” and activate the plugin once the installation is complete.
Step 2: Configure your favicon: After activation, each plugin has its own settings page or integration in the WordPress Customizer or another menu in your dashboard. Find the settings for your chosen plugin. These are usually described in the plugin’s documentation or can be found in a prominent tab or section labeled “Favicon”,” “Site Icon” or “Branding”
For Favicon from RealFaviconGenerator: Look for a new menu item labeled “Favicon” or an addition in the “Appearance” or “Settings” menu. Follow the on-screen instructions to upload your favicon image and configure the settings for different devices.
For All In One Favicon: Navigate to the settings page specific to the plugin, which you can usually find under “Settings” or directly in the dashboard menu. Here you can upload separate favicons for the front, back and login pages of your website.
For WP Site Icon: This plugin can be integrated directly into the WordPress Customizer or has its own settings page where you can easily upload and manage your website’s favicon.
Step 3: Upload and save your favicon: Once you have found the plugin’s favicon settings, upload your favicon file. Although these plugins often support different file formats, a square PNG or ICO file with at least 512×512 pixels is usually recommended to ensure compatibility and clarity on all platforms.
After uploading, check any additional settings or customization options that the plugin offers. Some plugins allow detailed customization for different platforms or devices.
Save your changes and visit your website to see your new favicon in action. It’s a good idea to test how your favicon displays on different devices and browsers to make sure it displays correctly.
Best practices
Consistent branding: Make sure your favicon matches your brand’s colors, logos and overall aesthetic so it’s instantly recognizable.
Regular updates: Keep your favicon and any associated plugins up to date to reflect changes to your brand identity or to take advantage of new features and plugin improvements.
Using a plugin for favicon management not only simplifies the process of adding and updating your site’s favicon but also ensures that your site icon is optimized for every platform, enhancing your brand’s visibility and consistency across the web.
Section 4: Manual upload via FTP
For those who prefer a hands-on approach or need to manually upload a favicon due to special requirements, using the File Transfer Protocol (FTP) provides full control over the placement of the file in your WordPress website’s directory structure. This section provides a basic understanding of FTP and a step-by-step guide to uploading a favicon.ico file directly to the root directory of your website.
FTP basics
FTP is a standard network protocol used to transfer files from one host to another over a TCP-based network, such as the Internet. To establish an FTP connection to your WordPress website, you need an FTP client— – software that allows you to manage the files on your server. Popular FTP clients are FileZilla, Cyberduck and WinSCP.
Before you can establish a connection, you’ll need the following information, which you’ll normally receive from your web hosting provider:
FTP address: The address of your server, often something like ftp.yourwebsite.com.
Username and password: Your FTP account’s login credentials.
Port: The port number used by the FTP server (usually 21).
Connect to your WordPress site via FTP: Open your FTP client and enter the FTP address, username, password and port in the appropriate fields. Most FTP clients have a quick connect function for easy access. Connect to the server. Once the connection is established, you’ll see the files and directories of your WordPress site. Navigate to the root directory, which is often called public_html or www.
Upload favicon
Prepare your favicon: Make sure your favicon file is named favicon.ico and is the recommended size of 512×512 pixels. Although browsers can reduce the size of larger icons, starting with the recommended size will ensure clarity on all devices.
Navigate to the root directory: In your FTP client, search for the root directory of your WordPress website. This is where the WordPress core files are stored, including wp-config.php.
Upload your favicon: Drag and drop the favicon.ico file from your computer into the root directory of your website. Make sure the transfer is complete before proceeding.
Check the upload: After uploading, refresh your browser and visit your website to see your new favicon in action. You may need to clear your browser’s cache if the favicon doesn’t appear immediately.
Best practices
Backup: Before making changes via FTP, it’s advisable to create a backup of your website. Although uploading a favicon is a relatively safe process, it’s advisable to create a backup in case other changes are accidentally made.
Naming the file: Make sure your favicon file is correctly named favicon.ico so that it’s automatically recognized by browsers.
Permissions: Check the file permissions if your favicon isn’t displayed after uploading. The file should generally be readable for everyone (permissions set to 644).
Test: Test your favicon with different browsers and devices to make sure it displays correctly. Some browsers use an aggressive cache for favicons, so you may need to clear the cache or use a private browser window to see the changes immediately.
Manual upload via FTP provides a direct and effective way to add or update a favicon on your WordPress website, giving you complete control over the placement and management of the file. This method is particularly useful for users with custom configurations or for those who prefer to manage their website’s files directly.
Section 5: Editing the header.php file
Why use a child theme?
A child theme acts as a safe zone for your customizations. It inherits styles and functionalities from your parent theme (the main theme you’re using) but allows you to make changes that won’t be overwritten during theme updates. This ensures your favicon code remains intact even after your theme receives an update.
Creating a child theme
If you don’t have a child theme set up yet, here are two options:
Manual creation: Follow the official WordPress guidelines (https://wordpress.com/support/themes/child-themes ) which involve creating a directory structure, a stylesheet (style.css), and potentially a functions file (functions.php) for your child theme.
Plugin assistance: Use a plugin to create child themes. These plugins simplify the process by automating the creation of a child theme based on your parent theme.
Adding the favicon code (Within your child theme):
Once you have a child theme established, follow these steps:
Locate the header.php file: Check if your child theme already includes a header.php file. If not, copy the header.php file from your parent theme and paste it into your child theme’s directory.
Edit the header.php file: Open the header.php file within your child theme directory for editing.
Important note: We won’t provide the specific code snippet here due to the potential for errors if implemented incorrectly. It’s advisable to consult a developer or seek resources on safe favicon code integration through the header.php file.
Safety first:
Remember, editing core theme files directly can be risky. By using a child theme, you create a secure environment for your favicon code and ensure it remains unaffected by future theme updates.
Alternatives for safe customization
If you’re apprehensive about code editing, consider these safer alternatives:
The WordPress customizer: This built-in tool offers an interface for adding a favicon.
Favicon plugins: Several plugins provide options for adding and managing favicon on your WordPress site.
The choice between advanced code editing and these methods depends on your comfort level and desired level of control over your favicon.
Section 6: Using a child theme
While there are simpler methods for adding a favicon to your WordPress site, using a child theme offers the most flexibility and security. This approach ensures your customizations remain intact even when your main theme (parent theme) receives updates.
Benefits of using a child theme:
Update proof: Theme updates often overwrite changes made directly to theme files. A child theme keeps your customizations separate, so parent theme updates won’t affect them.
Easy reversal: If your customizations cause issues, simply deactivate the child theme to revert back to the parent theme. Your changes remain within the child theme for easy re-activation later.
Organization: Child themes keep your custom code organized and centralized, making it easier to manage and understand modifications you’ve made.
Learning platform: For those interested in learning WordPress theme development, child themes provide a safe environment to experiment without risking your live site.
Adding a favicon link with a child theme:
Here’s a step-by-step guide on how to add a favicon using a child theme:
1. Create a child theme (if needed):
If you don’t have a child theme already, you’ll need to create one. Here are the essentials:
Two files: style.css and functions.php and style.css content (place at the beginning of the file):
CSS
/*
Theme Name: Your Child Theme Name
Description: A child theme for [Parent Theme Name]
Author: Your Name
Template: [Parent Theme Directory Name]
Version: 1.0.0
*/
Use code with caution. Replace bracketed information with your specific details.
functions.php content:
PHP
<?php
add_action( ‘wp_enqueue_scripts’, ‘enqueue_parent_styles’ );
function enqueue_parent_styles() {
wp_enqueue_style( ‘parent-style’, get_template_directory_uri().’/style.css’ );
}
Use code with caution.
2. Upload your favicon file: Place your favicon file in the root directory of your child theme.
3. Modify the header.php file: If your child theme doesn’t have a header.php file, copy it from your parent theme’s directory and paste it into your child theme’s directory. Open the header.php file within your child theme and locate the <head> section. Here, insert the following code:
HTML
<link rel=”icon” href=”<?php echo get_stylesheet_directory_uri(); ?>/favicon.png” sizes=”32×32″ />
Use code with caution.This code dynamically generates the URL for your favicon based on your child theme’s location. Adjust the file name and path if your favicon has a different name or format.
4. Activate your child theme: Navigate to Appearance > Themes in your WordPress dashboard. If your child theme isn’t already active, click the “Activate” button for your child theme.
Best practices:
Regular backups: Always create a backup of your website before making any changes, even when using a child theme.
Test thoroughly: After adding the favicon link, test your website across different browsers and devices to ensure the favicon displays correctly.
Keep it updated: If you’ve made custom functionality or template changes within your child theme, ensure they remain compatible with the latest WordPress and parent theme versions.
By using a child theme for favicon customization, you gain a flexible and secure approach to personalizing your WordPress website while maintaining the integrity of your theme during updates.wpengine.com/resources/create-child-theme-wordpress
Section 7: Multisite network favicon
In a WordPress multisite network, having a network-wide favicon helps maintain consistent branding across all sites within the network. This centralized approach ensures that all sites have the same favicon. However, it’s important to consider the individual identity and branding needs of each site within the network. Here, we’ll explain how network administrators can set up a network-wide favicon and what factors they should take into account.
Step 1: Select your favicon: First, make sure your favicon is ready and complies with the general favicon guidelines (512×512 pixels, square and in a web-friendly format such as PNG or ICO).
Step 2: Upload your favicon to a central location: Upload your favicon file to a central location that is accessible throughout the network. This can be in the main site’s media library or on an external server that hosts static files. Make sure that the URL of the favicon is known and accessible.
Step 3: Implement the favicon network-wide: There are several methods to implement the favicon network-wide: Via a must-use plugin: create a simple must-use (MU) plugin that ranks the favicon on all websites in the network. Must-use plugins are automatically activated and cannot be deactivated via the admin dashboard, making them ideal for network-wide settings.
Here is a sample code for an MU plugin:
Php – copy code
<?php
// Plugin name: Network Wide Favicon
add_action(‘wp_head’, ‘nwms_network_wide_favicon’);
function nwms_network_wide_favicon() {
echo ‘<link rel=”icon” href=”URL_TO_YOUR_FAVICON” sizes=”32×32″ />’;
}
Replace “URL_TO_YOUR_FAVICON” with the actual URL to your favicon. Save this code in a PHP file and upload it to the /wp-content/mu-plugins/ directory. If the directory doesn’t exist, you may need to create it.
Via Network Admin Settings: If you’re using a network management plugin that allows for script injections or custom code implementations, you can insert the <link> tag for the favicon directly into the header section via the network admin’s settings panel.
Considerations: Network-wide favicon approach
Brand consistency vs. individuality: A network-wide favicon improves consistency across all websites. However, it may not be appropriate for individual sites within the network that want to maintain their own identity. Consider giving site administrators the ability to override the network-wide favicon if needed.
Technical considerations: Ensure that the favicon loads efficiently without causing additional load times for sites within the network. Using a CDN to host the favicon can improve load times and accessibility.
Updates and changes: Any changes to the network-wide favicon will be immediately visible on all websites. Talk to the site administrators if changes are planned, especially if individual sites use custom favicons.
Fallback options: It’s good practice to provide a network-wide default favicon while allowing individual sites to upload their own favicons. This preserves the overall branding of the network while respecting the autonomy of individual websites.
Implementing a network-wide favicon on a WordPress multisite network provides a streamlined approach to managing site icons, but requires a careful balance between the uniformity of the network and the unique needs of individual sites. By providing clear guidelines and flexible options, network administrators can ensure a cohesive online presence that supports both the network’s brand and each site’s identity.
Section 8: HTML code snippet in a widget
Using a custom HTML widget to add a favicon to your WordPress website is an unconventional but possible approach. This method involves inserting HTML code directly into a widget area that is normally reserved for sidebars or footers. While this is not the standard method for implementing favicons, it can be used for certain use cases where traditional methods are not feasible or where temporary or situational favicons are needed.
Custom HTML widget: Adding a favicon
Step 1: Accessing widgets: Navigate to your WordPress dashboard and go to Appearance > Widgets. In this section, you can manage the widgets on your website.
Step 2: Adding a custom HTML widget: Find the “Custom HTML” widget in the list of available widgets. Click on it and select the area you want to add it to (e.g. sidebar, footer). Then click on “Add widget”
Step 3: Insert HTML code for favicon: Paste the following HTML code into the content area of the custom HTML widget you have just added: Copy code <link rel=”icon” href=”URL_TO_YOUR_FAVICON” type=”image/x-icon” /> Replace URL_TO_YOUR_FAVICON with the actual URL where your favicon file is hosted. This could be within your WordPress media library or an external URL.
Step 4: Save and check: Click “Save” on the widget settings. Remember, browsers might cache the previous favicon, so you may need to clear your browser cache or check in an incognito window.
Use Cases: When to use this method
Temporary change of the favicon: If you need to temporarily change your favicon for an event, promotion or seasonal theme, using a custom HTML widget can be a quick way to implement this change without affecting the site’s general settings or having to access the theme files.
Non-default locations: In scenarios where you’re working with a highly customized theme or a managed WordPress environment that restricts access to theme files and the customizer, a widget can provide a workaround to add or change a favicon.
Educational purposes: For those learning HTML or WordPress customization, experimenting with changes such as adding a favicon via a widget can be an educational exercise in understanding how HTML elements affect the front end of a website.
Best practices
Consider alternatives first: Before using this method, you should check whether the traditional methods (via the Customizer, theme settings or plugins) are suitable for your needs, as they are generally easier and more reliable for managing favicons.
Check visibility: Make sure that the widget area you have chosen is active on all pages of your website. Some themes do not display certain widget areas on every page, which can lead to inconsistent favicon visibility.
Monitor performance: Adding additional HTML through widgets can easily affect page load times, especially if the favicon file is large or hosted externally. Make sure your favicon is optimized for use on the web.
Using a custom HTML widget to add a favicon to your WordPress website is a creative solution that works for certain scenarios. While it offers flexibility and a quick solution in certain situations, it’s important to balance this method with more traditional approaches to website icon management to ensure it aligns with your overall website management and branding strategy.
Section 9: Integrating with the site icon API
The Site Icon API in WordPress is a useful tool for theme and plugin developers. It allows you to easily manage and integrate site icons (favicons) into your projects using code. With this API, you can check if a site icon exists, get its URL, and generate the necessary HTML code to include it in the head section of your site. By using the Site Icon API, you can ensure that your theme or plugin can handle site icons dynamically, providing a smooth experience for users while following WordPress standards.
Overview of the site icon API
The Site Icon API centres around several key functions that developers can use within their themes or plugins:
has_site_icon(): Checks whether a site icon has been set.
get_site_icon_url(): Retrieves the URL of the current site icon.
wp_site_icon(): Outputs the site icon HTML code in the head section of the site.
These functions can be used to add custom site icon functionality or to enhance existing features within your theme or plugin.
Example 1: Checking and displaying a site symbol: This example shows how to check whether a site icon is set and then display it in an HTML image tag.
Copy code
if ( has_site_icon() ) {
$site_icon_url = get_site_icon_url();
echo ‘<img src=”‘ . esc_url( $site_icon_url ) . ‘” alt=”Site Icon”>’;
}
Example 2: Adding site icon HTML to the head section: While wp_site_icon() is called automatically in modern themes, if you’re developing a custom theme or need to insert the site icon manually, you should ensure that it’s inserted correctly in the head section.
Copy code
function mytheme_add_site_icon() {
if ( ! has_site_icon() ) {
// Fallback to a default icon if no site icon is set
echo ‘<link rel=”icon” href=”‘ . esc_url( get_template_directory_uri() ) . ‘/images/default-icon.png” sizes=”32×32″ />’;
} else {
// The wp_site_icon function outputs the necessary HTML for the site icon
wp_site_icon();
}
}
add_action( ‘wp_head’, ‘mytheme_add_site_icon’ );
Example 3: Dynamic updating of the site icon: For plugin developers who need to update the site icon based on certain conditions (e.g. changing the icon for a holiday theme), you can use the update_option() function. Note that this function should be used sparingly and with clear documentation for users, as it changes a global setting.
Copy code function update_mytheme_site_icon() {
// The ID of the new site icon attachment from the media library
$new_icon_id = 123;
update_option( ‘site_icon’, $new_icon_id );
}
// Trigger this function at a suitable point in your theme/plugin
Best practises
User consent: If you change website icons programmatically, especially in plugins, make sure that users are informed and have consented to these changes.
Performance considerations: Avoid unnecessary calls to update_option() for site icons, as changes can affect caching and site performance.
Fallback mechanisms: Provide fallback options or allow users to easily revert to their original icons.
Whether extending a theme or developing a plugin, the Site Icon API provides the tools necessary to integrate site icon functionality effectively and responsively.
Section 10: A CDN for your favicon
Using a Content Delivery Network (CDN) to deliver your website’s favicon can significantly improve loading times, especially for visitors who are far away from your web server. A CDN is a network of globally distributed servers used to deliver content, including images such as favicons, more efficiently to users depending on their geographical location.
CDN benefits
Faster loading times: If you serve your favicon via a CDN, it will be delivered from the server closest to the user’s location, reducing load time.
Reduced server load: Offloading static assets such as favicons to a CDN can reduce the load on your primary server, improving the performance of other aspects of your website.
Increased reliability: CDNs are designed to handle high traffic and mitigate issues such as DDoS attacks. This ensures that your favicon is available even during traffic spikes or server outages.
Global reach: For websites with a global audience, a CDN ensures that visitors experience fast load times from any location.
Step 1: Choose a CDN provider
Select a CDN provider that suits your needs. Many popular CDN services offer WordPress integration, such as Cloudflare, KeyCDN, and Amazon CloudFront.
Step 2: Upload your favicon
Prepare your favicon: Make sure your favicon is optimized for use on the web. Although WordPress recommends a 512×512 pixel image, you can also include versions in different sizes for different devices.
Uploading to CDN: Follow your CDN provider’s instructions for uploading files. This usually involves logging into your CDN account, creating a new container or directory and uploading your favicon file there.
Step 3: Integrate the CDN favicon into your WordPress website
Retrieve the favicon URL: After uploading, the CDN will provide a direct URL to your favicon. Copy this URL.
Linking the favicon in WordPress: You have several options for linking the favicon hosted by the CDN to your WordPress website:
Via the WordPress Customizer: if your theme supports it, go to Appearance > Customize > Site Identity and paste the CDN URL into the Site Icon section.
Via the Header.php file: If you are using a child theme, you can manually add the <link> tag for your favicon to the header.php file. Replace the href attribute with the URL of your CDN favicon: Copy code: <link rel=”icon” href=”YOUR_CDN_FAVICON_URL” sizes=”32×32″ />
Plugin or functions.php: Use a plugin that allows custom headers or add a function to the functions.php file of your theme to load the favicon.
Step 4: Test your favicon
After implementation, go to your website and clear your browser cache to ensure that the favicon hosted on the CDN is displayed correctly. You should also test the loading times and display on different devices and networks.
Best practices
Monitor CDN performance: Regularly check the performance of your CDN to ensure it is meeting the needs of your website and adjust configurations as needed.
Use HTTPS: Make sure the CDN URL for your favicon uses HTTPS to avoid mixed content warnings and improve site security.
Fallback option: Consider a fallback mechanism in case the CDN fails. This can be done using JavaScript to detect if the CDN favicon fails to load and then switch to a locally hosted version.
Using a CDN for your WordPress site’s favicon not only improves load times but also reliability and usability on a global scale. By following these steps and best practices, you can efficiently implement a CDN-hosted favicon and contribute to a faster and more stable online presence.
Best practices
Image size and quality: For optimal display on all devices, WordPress recommends using an image with a size of 512×512 pixels. This size ensures that your favicon not only looks sharp in browser tabs but also when saved on the home screen of a smartphone or displayed elsewhere.
Image format: While you can upload your favicon in a variety of formats, PNG is generally recommended. PNG files support transparent backgrounds, making your favicon more versatile to use against different backgrounds and look good regardless of browser or device.
Design considerations: Given the small size of favicons, it’s important to choose a simple and recognizable design. Complex logos may not translate well to such a small image. Strive for simplicity or use a single letter or symbol that represents your image.
Consistency: Your favicon should be consistent with your logos and colours. This consistency will help reinforce your identity on different platforms where your favicon might appear.
Testing: After you’ve added your favicon, make sure to check how it looks on different browsers and devices. This way, you can make sure that your favicon shows up correctly and is easily recognizable. It’s important to provide a smooth experience for your visitors.
To further explore the world of favicons and WordPress site management, here are some valuable resources that can enhance your learning and provide you with tools to create, manage, and optimize favicons effectively:
Favicon creation tools
RealFaviconGenerator: https://realfavicongenerator.net
A comprehensive tool that not only helps you create favicons but also ensures they are compatible across all platforms and devices.
Favicon.io: https://favicon.io
Offers a simple way to create favicons from text, images, or emojis. It’s perfect for quick favicon generation.
Canva: https://www.canva.com
While not exclusively for favicons, Canva is an excellent tool for designing custom icons that can be exported and used as favicons.
Learning resources
WordPress Theme Developer Handbook: Explore in-depth tutorials and guides on theme development, including how to properly use the Site Icon API. https://developer.wordpress.org/themes
WordPress Plugin Developer Handbook: Learn about plugin development if you’re interested in creating a plugin that manages favicons.https://developer.wordpress.org/plugins
W3Schools – How TO – Add a Favicon to Your Website https://www.w3schools.com/howto/howto_add_favicon.as
MDN: The External Resource Link element
CDN Resources
Cloudflare: https://www.cloudflare.com
Offers CDN services that can be used to host and deliver favicons quickly across the globe.
KeyCDN: https://www.keycdn.com
Amazon CloudFront: https://aws.amazon.com/cloudfront
Blogs and Community Forums
WordPress Support Forums: https://wordpress.org/support/forums
A place to ask questions and share knowledge about WordPress, including theme and plugin development.
Stack Overflow: https://stackoverflow.com
A vast community of developers. A great resource for specific programming questions, including WordPress and web development topics.
These resources cover a wide range of needs, from creating your first favicon to integrating it with WordPress and using advanced techniques like CDNs for optimization. Whether you’re a beginner or an experienced developer, these tools and learning materials can help you make the most out of your favicons and enhance your WordPress site’s branding and performance.
FAQs: Adding a favicon to a WordPress site
What is a favicon?
A favicon, short for “favorite icon,” is a small, iconic image that represents your website in a web browser’s tab, bookmark list, and within the address bar for some browsers. It helps with branding and makes your site easily identifiable.
How can I create a favicon?
Favicons can be created using various online tools or software like Adobe Photoshop. The ideal size for a favicon is 512×512 pixels, which WordPress will automatically scale for different devices.
Where do I upload my favicon in WordPress?
In WordPress, you can upload your favicon by navigating to Appearance > Customize > Site Identity. Here, you’ll find the option to upload your site icon (favicon).
What file format should the favicon be?
WordPress supports .ico, .png, and .gif formats for favicons, but .png is recommended for its support across all browsers and devices without losing quality.
Can I use different favicons on different pages of my WordPress site?
By default, WordPress uses the same favicon across the entire site. To use different favicons on different pages, you would need to use a plugin or add custom HTML to the header of each specific page.
What is the WordPress icon?
The WordPress icon is generally the logo used to symbolize WordPress. It’s prominently featured in the platform’s branding and throughout its user interface. For a deeper understanding of the color choices and design principles behind the WordPress logo, you can explore WordPress Icon Colour Theory.
Where can I find icons for WordPress?
There are numerous sources to obtain icons tailored for WordPress usage. Whether you’re looking for aesthetic enhancements or functional symbols, you can begin your search at Icons for WordPress.
How do I use icons in WordPress?
Incorporating icons into your WordPress site can improve navigation and aesthetic appeal. For a guide on how to effectively use these visual elements, visit Icons in WordPress.
What are WordPress dashicons?
Dashicons are the official icon font for the WordPress admin area, used across various parts of the WordPress dashboard to provide a cohesive visual experience. For more information on using dashicons, check out WordPress Dashicons.
Are there free WordPress icons available?
Yes, WordPress users have access to a variety of free icons that can be used to enhance site design and user experience. Discover a collection of free SVG icons for WordPress at Free WordPress SVG Icons.
Where can I get free WordPress icons for business?
If you’re looking for icons specifically designed for business websites, there are many resources offering free icons with a professional appearance. For a selection of business-oriented icons, visit Free WordPress Icons for Business.
Can I use emojis in WordPress?
Emojis can be a fun and effective way to communicate with your audience. WordPress supports emoji integration across posts, pages, and comments. Learn how to add emojis to your WordPress site by visiting How to Add Emojis to Your Website.
What icons are good for WordPress e-commerce sites?
Icons are particularly useful in e-commerce settings to guide users and facilitate transactions. Find out which icons are best for your e-commerce site and how to implement them at WordPress Icons for Ecommerce.
How do I add social media icons to my WordPress site?
Social media icons can link your site with your social media profiles, helping to increase your audience engagement. For tips on adding and customizing social media icons in WordPress, head to Social Media Icons WordPress.
What is a WordPress services icon?
A WordPress services icon is a graphical representation used to symbolize different services offered by WordPress professionals, such as hosting, SEO, or development. For icons that can represent your WordPress services, visit WordPress Services Icon.
Can I use animated WordPress icons?
Yes, you can use animated WordPress icons by incorporating GIFs, CSS animations, or animated SVGs.
What is the difference between PNG and SVG free WordPress icons?
PNG icons are raster images with fixed resolution, while SVG icons are vector graphics that can scale without losing quality, making SVGs preferable for free WordPress icons.
What icon should I use for hospitality in WordPress?
For hospitality businesses like hotels and restaurants, specific icons can help visitors navigate your services and facilities. To find icons suitable for the hospitality industry, check out Hospitality WordPress Icon.
These expanded FAQs provide a thorough overview of the various types of icons available for WordPress and how you can utilize them to enhance your site.
WordPress itself
Official Website
wordpress.org – This is the official website for WordPress, where you can download the software, find documentation, and learn more about using it.
WordPress Codex
codex.wordpress.org/Main_Page – This is a comprehensive documentation resource for WordPress, covering everything from installation and configuration to specific functionality and troubleshooting.
WordPress Theme Directory
wordpress.org/themes – The official WordPress theme directory is a great place to find free and premium WordPress themes. You can browse themes by category, feature, and popularity.
maxiblocks.com/go/help-desk
maxiblocks.com/pro-library
www.youtube.com/@maxiblocks
twitter.com/maxiblocks
linkedin.com/company/maxi-blocks
github.com/orgs/maxi-blocks
wordpress.org/plugins/maxi-blocks